*FYI - this post may contain affiliate links, which means we earn a commission at no extra cost to you if you purchase from them. Also, as an Amazon Associate I earn from qualifying purchases. Check out our Privacy Policy and Disclosure. for more info.
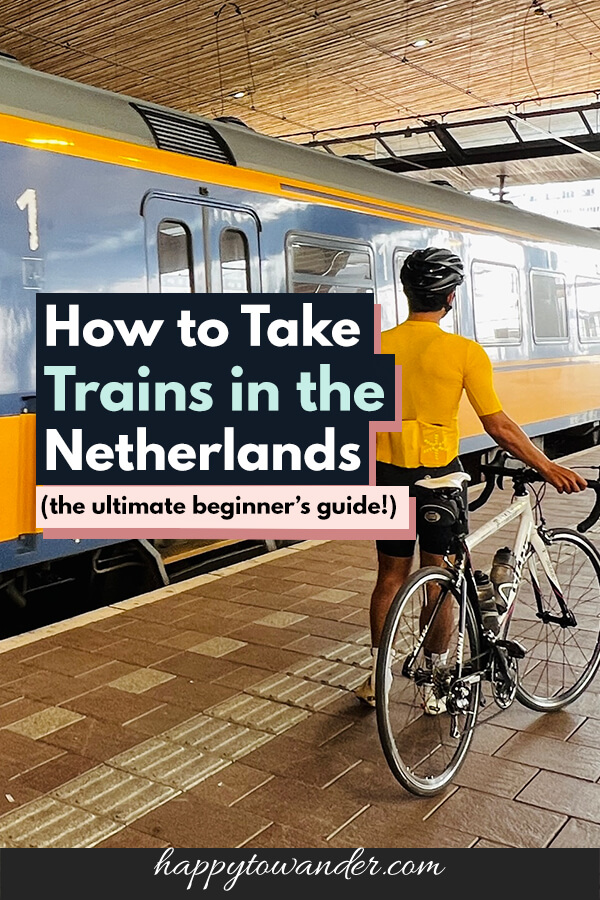
If you’re a newbie to train travel in the Netherlands, you’re in luck!
The Netherlands may well be one of the easiest countries in Europe to navigate by train, and in this post I’m going to show you how… step by step!
From deciding whether trains are the best option for you to finding the best deals on train tickets in the Netherlands, all the way to finding and boarding the correct train and what to do when you disembark, this post will walk you through in plenty of detail how to take trains in the Netherlands.
I hope you find this helpful, and don’t forget to save this post for future travels!
Save this guide on how to travel the Netherlands by train for later!
You’ll be very glad you did.
Step One: Decide if Train Travel in the Netherlands is Right for You
I personally think that trains and buses are the best way to get around the Netherlands for city to city travel.
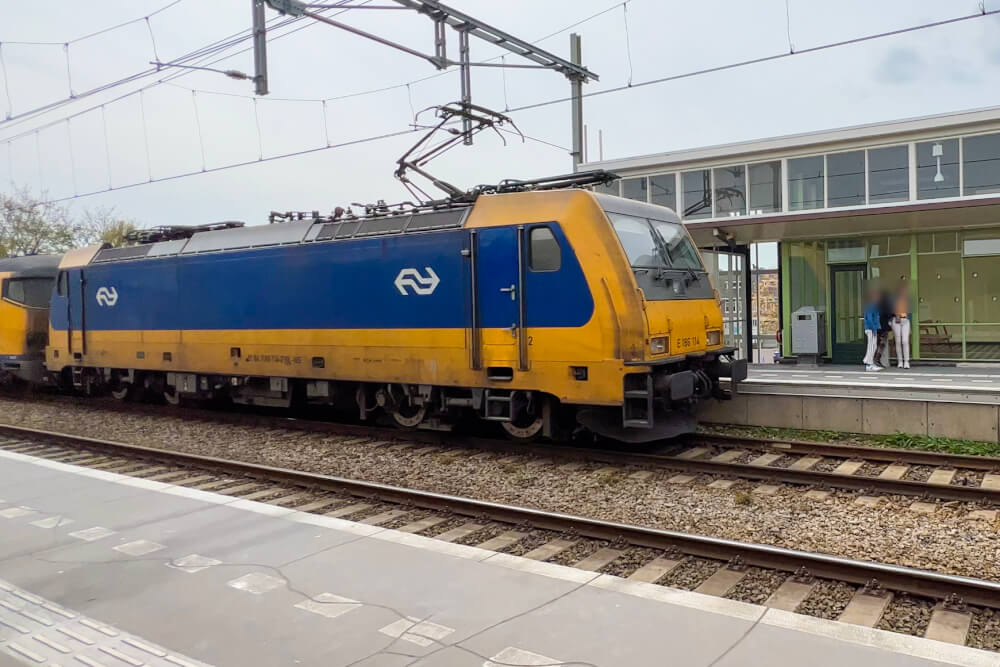
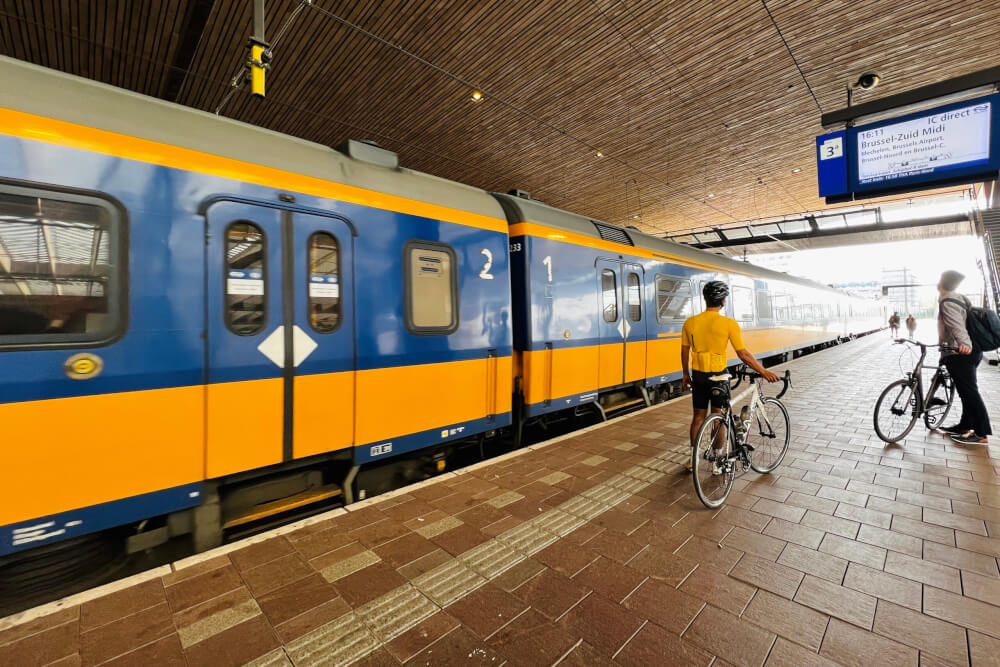
The train network in the Netherlands is the stuff of dreams – clean, easy to use, and impressively widespread, with about 400 train stations across the country. All domestic trains are run by the national rail company NS (Nederlandse Spoorwegen), who have 2 different types of trains:
- Sprinter: Covers short journeys and stops at every station on the train’s route
- Intercity: Covers medium and long distance routes and only stops at major stations on the train’s route; usually has more amenities like toilets and quiet zones

In cases where there are no trains available to your final destination, I would supplement with local buses. The app 9292 is great for showing you journeys from Point A to Point B using local transport networks.
If you’re on a budget, coaches / buses may be a more affordable option than trains. If you want to consider this, I’d recommend hopping on Omio, which shows you planes, trains and buses from Point A to Point B.
NOTE: One small issue I’ve had with Dutch trains is that many of the shorter distance Sprinter trains (e.g. those meant for covering shorter distances) lack adequate space for luggage, making travelling quite awkward if you have a lot of bags, or go during a peak time. So, if you have a lot of luggage, consider buying a 1st class ticket for more space, and plan to go during off-peak times whenever possible.
Unlike larger European countries where budget airlines like Ryanair, easyJet and Wizz Air offer cheap ways to from one city to another, domestic flights in the the Netherlands are quite rare, so odds are you’ll be taking the train in the Netherlands at some point.
So, with that in mind, let’s move onto…
Step Two: Buy Your the Netherlands Train Tickets
The pricing of trains in the Netherlands is fixed based on distance, meaning the ticket price doesn’t change based on demand/timing like in other countries. This means there isn’t as much pressure to book in advance like there is with the UK train system or German train system for instance.
That said, you can get a small discount for booking at least a day in advance during off-peak periods through the NS PriceTime offer, but that’s only for off-peak trains.
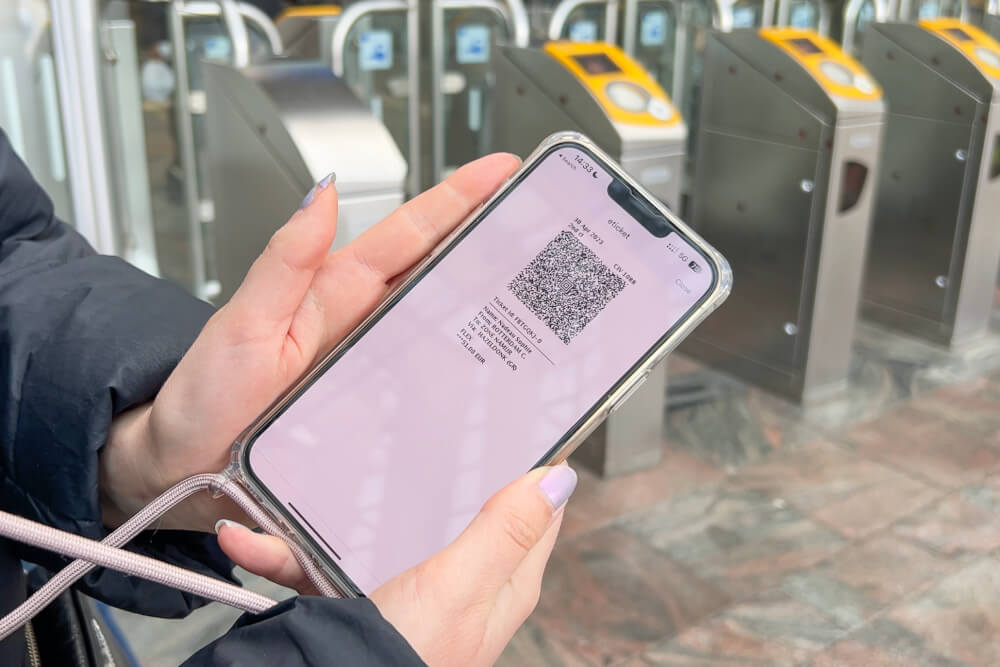
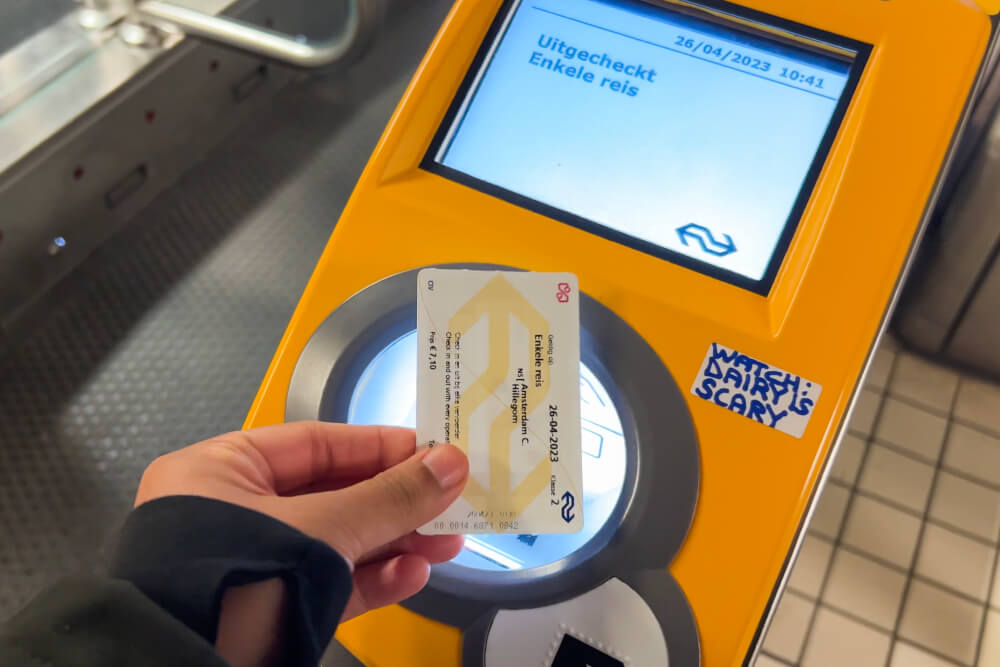
Now, as for how to actually get these tickets: I have great news. You don’t need to buy tickets! This is because as of 2023, you can take advantage of the OVpay system and use contactless credit and debit cards to pay, which means you can just show up at the station, tap your card at the fare gate and your card will be charged the corresponding amount automatically.
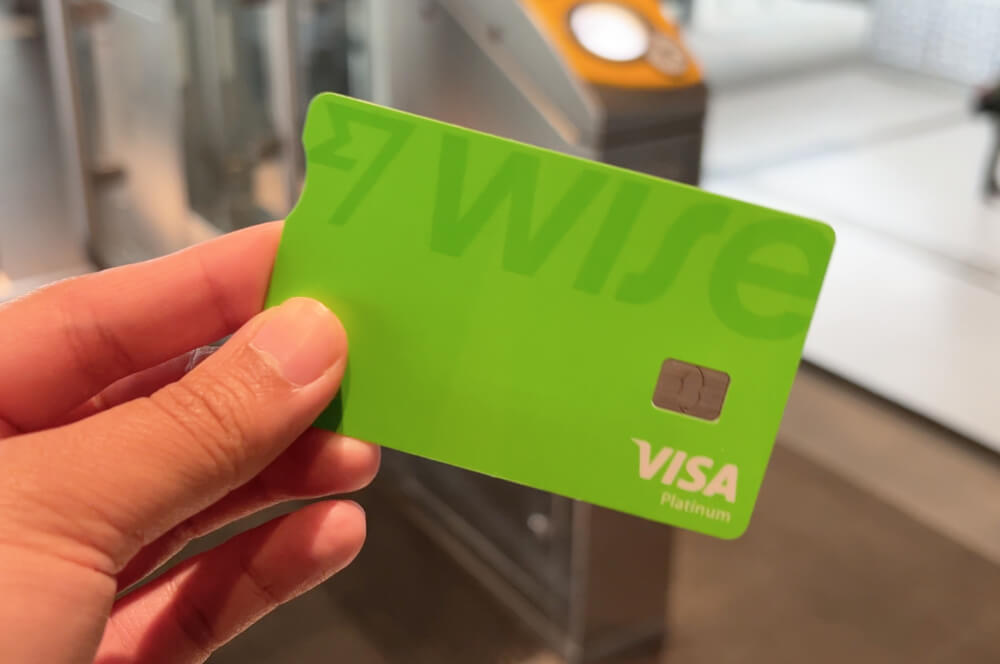
In my opinion, this is the easiest way for visitors, and means you don’t need to worry about buying the right ticket in advance, though beware that this method only works for second class travel. First class passengers will need to buy a ticket (whether physical or e-ticket).
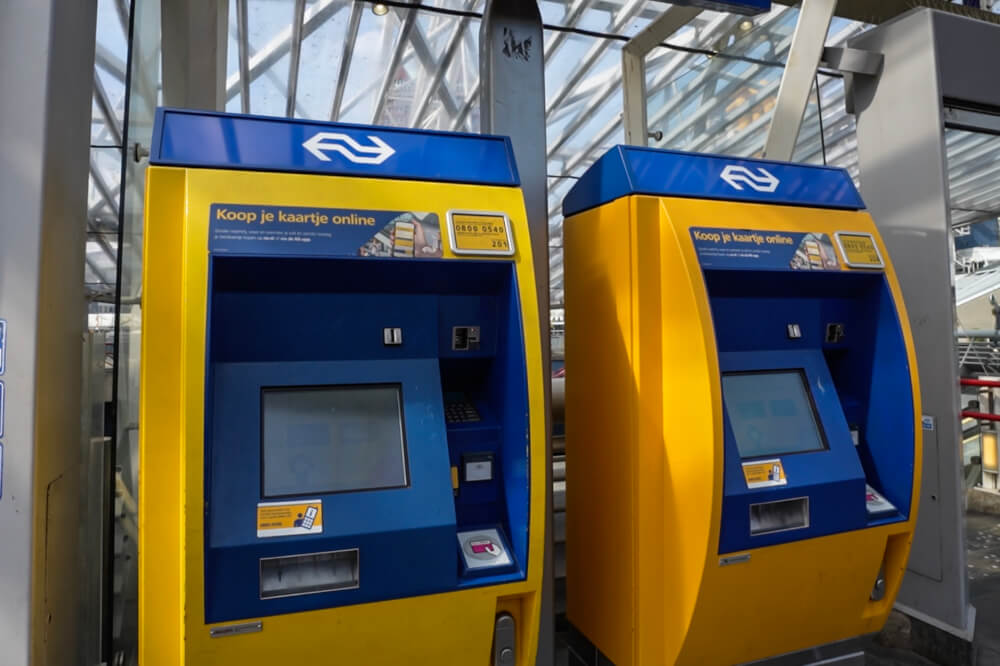
NOTE: Buying physical tickets from the yellow/blue machines at train stations incurs an extra 1 euro fee, so you’re definitely better off just tapping with a card or getting an e-ticket.
In terms of e-tickets, the easiest is getting them through the official NS app. You can also consider third party sites like Omio or Trainline if you are booking a lot of transport across different countries and want to keep all your tickets in one place. Do know that often they charge an extra service fee though!
You can read my full Omio review or full Trainline review for more information. I’ve even done an Omio vs Trainline comparison because I’m a nerd. Enjoy!
When buying single tickets in the Netherlands, do note that most trains within the country are open tickets valid for the entire day, and not tied to any specific train.
So, let’s say you wanted to board a train from Amsterdam to Utrecht at 2pm, your ticket won’t say 2pm on it, it will simply state the date and period of validity (e.g. off-peak times, if applicable)… so don’t stress too much about catching the exact train that you intended because your ticket isn’t tied to that one departure. Exceptions are usually longer distance trains like the Eurostar that require reservations.
When buying e-tickets, pay attention to…
- 1st vs 2nd class: Your ticket is only valid for the class you purchased. In most cases, there isn’t a dramatic difference between first and second class seats on Dutch trains. The main perk of first class is it’s generally quieter and sometimes the seats are slightly comfier or more spacious. If you are travelling 1st class, make sure you buy an e-ticket as using OVpay only works for 2nd class.
- Single vs return: Again, because Dutch trains are priced based on distance travelled, it’s not cheaper to buy a return (AKA roundtrip) ticket, but it may be more convenient to save you having to buy/manage multiple tickets
- Regular full fare vs off-peak pricing: If you buy a discounted off-peak period ticket, then that ticket will NOT be valid during rush hour. The timing of your train depends on when you ‘check in’ (tap in at the machine) so keep this in mind.
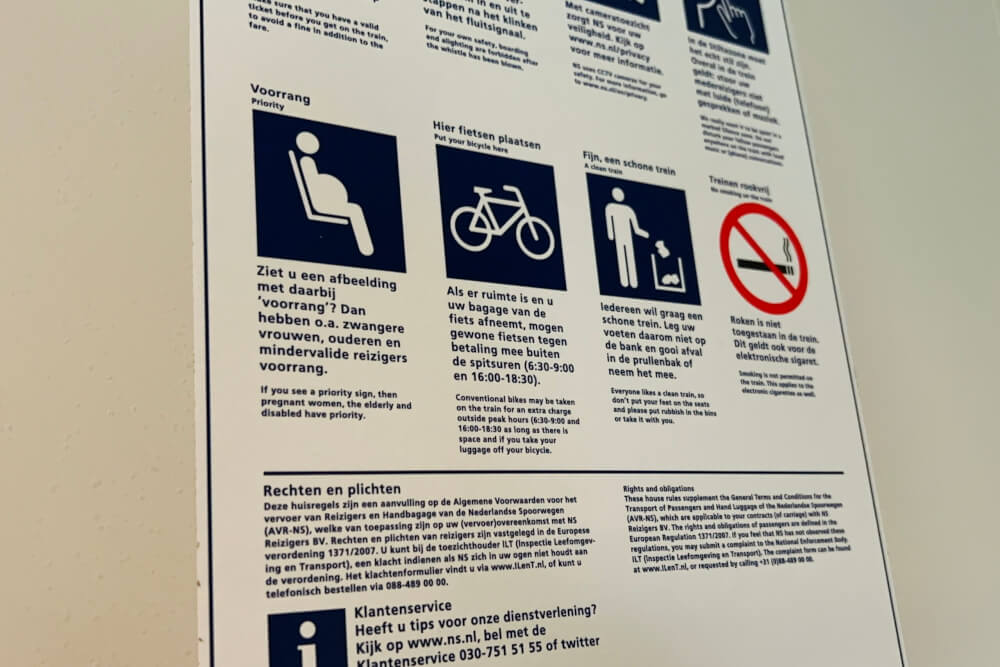
- Relevant add-ons: If you are bringing a bike or a dog on board, you will need to buy a supplemental ticket.
Now, if budget is your #1 priority, there are some additional tricks to saving money on train tickets in the Netherlands. Here are some of the most popular ways:
- Book in advance for off-peak periods: As previously mentioned, through the NS PriceTime offer, you can get a discount of up to 60% if you book at least a day in advance for weekdays before 06:30, between 09:00 and 16:00, and after 18:30, as well as all day during weekends and public holidays.
- Group tickets: Give you more savings the more people you have in your group.
- Day tickets: Cover you for a large zone, giving you unlimited travel, e.g. the Amsterdam Travel Ticket or Amsterdam and Region Travel Ticket
- Attraction / special deal tickets: Look on the official NS website here for special deals and offers, usually including admission to places with some food and the train tickets all for one set price. so be sure to give those a look.
FOR LONG TERM VISITORS: There are also personal OV cards you can buy and reload with credit, which unlock a bunch of perks and discounts, but this wouldn’t really make sense unless you’re planning on spending a lot of time in the Netherlands.
Finally, if you are travelling to multiple countries in Europe and want optimal flexibility and ease, it may be worth looking to a Eurail pass, but whether or not that’s worth it depends on many factors which I cover in my full Eurail pass review so be sure to give that a read if you’re considering it.
Alright with all that ticket info out of the way, it’s time to move onto the day of your Dutch train journey, with…
Step Three: Get Snacks
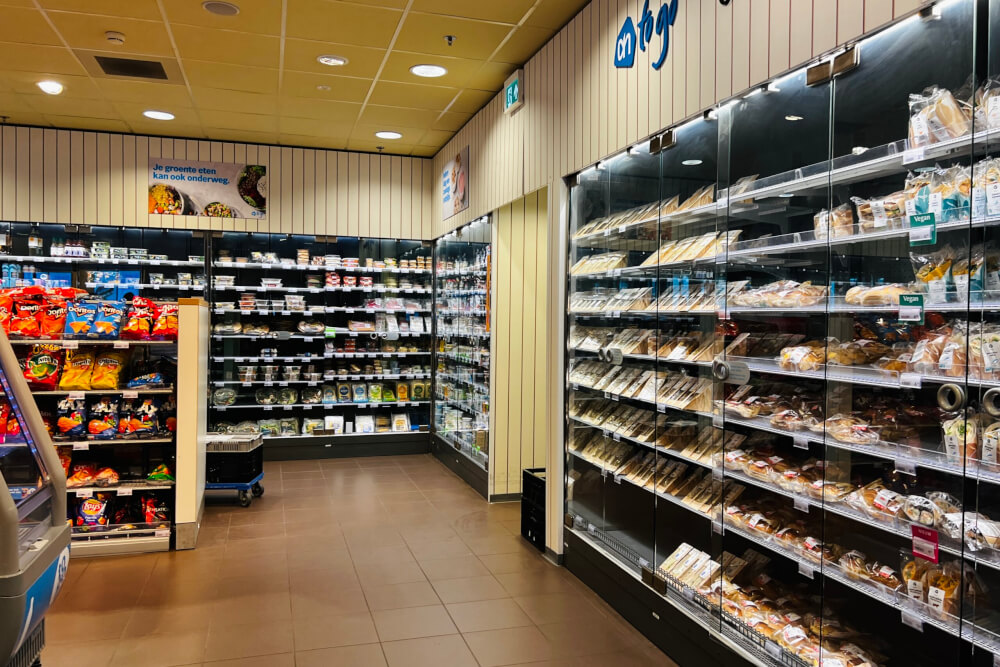
Before heading to the station I highly recommend making sure you have some snacks or drinks to bring with you on the train as they do not sell anything on board regular Sprinter trains and food service isn’t guaranteed on Intercity trains.
Eating and drinking is allowed on trains (assuming what you’re consuming isn’t too pungent), and it’s always good to have some refreshments in case of long delays… which are rare in the Netherlands, but you never know when you might get struck by random hunger pangs or thirst!
At the very least, make sure you have water or something to drink, in case you’re hit with a delay. Albert Heijn is the biggest supermarket chain in the Netherlands, and has a lot of easy grab and go options.
There are usually also options at the train station too, but don’t count on this for smaller stations.
Now let’s move onto…
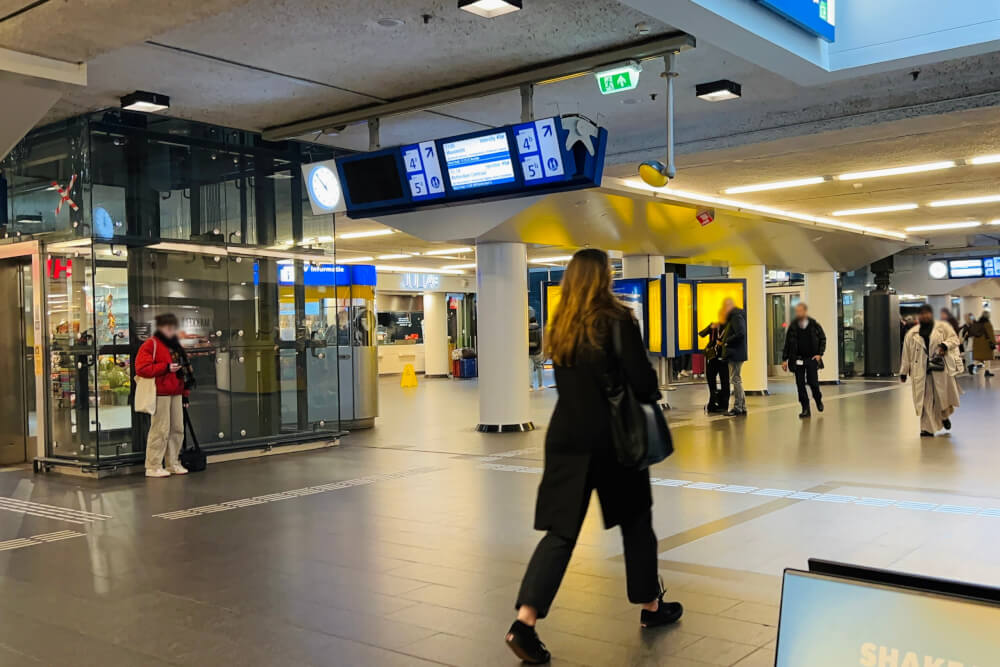
Step Four: Arrive at the Station
First off, before you go, double check that you are headed to the right station. Some cities will have multiple stations, like in Amsterdam, where there’s nine (the main ones being Amsterdam Centraal and Amsterdam Sloterdijk) or Rotterdam, where there’s four.
Now, if it’s your first time at this station, I recommend you arrive thirty minutes or more in advance of your departure time.
While train stations in the Netherlands are fairly straight-forward for the most part, larger stations (like Amsterdam Centraal, with 15 tracks) can be overwhelming for first timers.
If you are getting to the train station via public transport, you may be a bit disoriented upon arrival because big train stations may serve as general transport hubs with different areas for the Metro, Trams, and Buses.
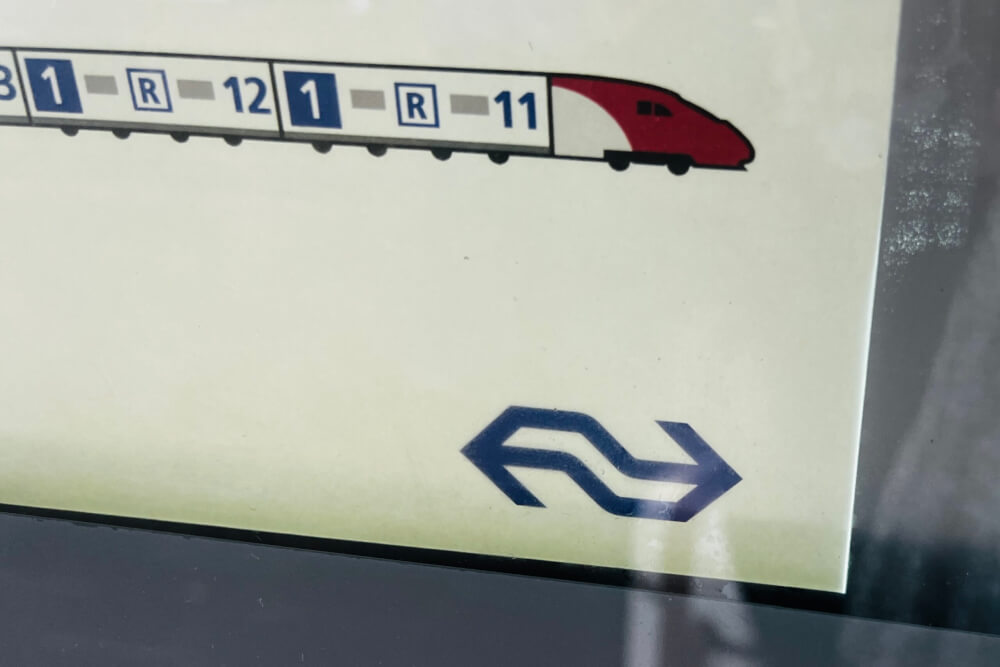
To get to the right place, look for the train symbol, which looks like this (or of course, in a pinch, ask someone):
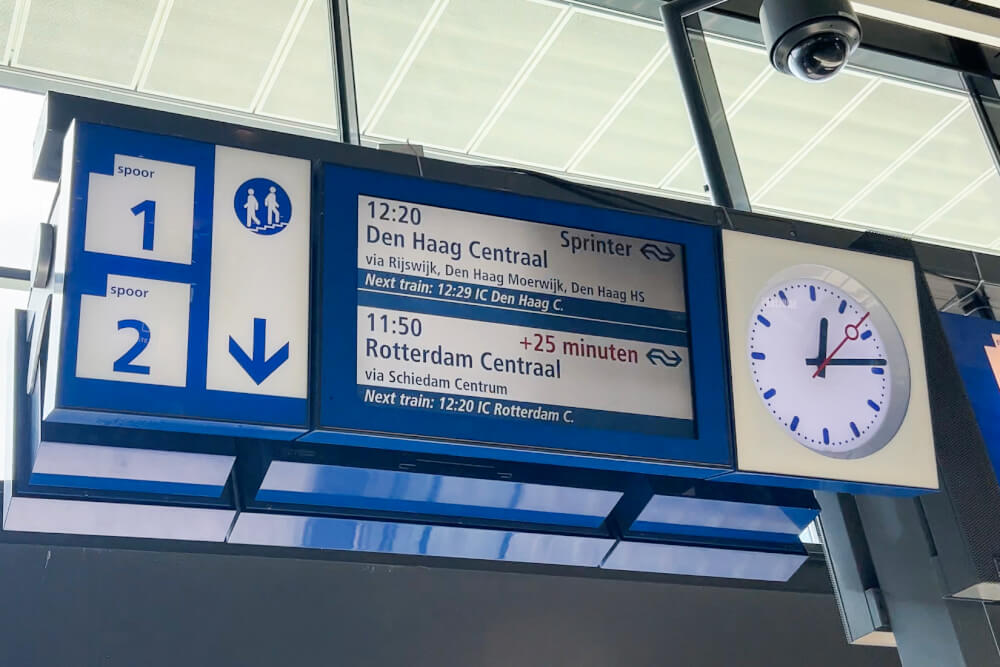
Now when you get to the main concourse of the train station, your priority is finding out which platform your train is on. Often they will tell you on apps like the NS app or Trainline as well.
Luckily, unlike some other countries where the platform isn’t known until trains are due to arrive, trains in the Netherlands tend to have certain tracks reserved for certain routes/destinations. This means you should usually know the track number well in advance, so just have a look at a Departures board to confirm.

When looking at this remember that trains will not necessarily say your destination, but rather usually the final destination of the train, so remember to look up what the final destination of your train is before you head to the station.
Once you get there, look for matches in terms of the departure time, and see if your destination is listed underneath as “via _____”. If there are multiple trains with the same departure time, just make sure the final destination is the one you looked up previously.
NOTE: Make sure you know destination name in Dutch, because usually the name shown on Departure boards and trains will be the Dutch name (e.g. Den Haag, rather than The Hague).
Once you know your platform number, then it’s onto your next mission which is…
Step Five: Get to the Platform
Platform numbers will generally be very well marked so just look up for signs before making your way (Spoor is the Dutch word for platform, by the way).
When you are making your way to the platform, be sure to have your ticket or contactless card ready.
In the Netherlands, most stations have electronic gates that require tickets to be scanned (or contactless cards tapped) before you enter the area with platforms.
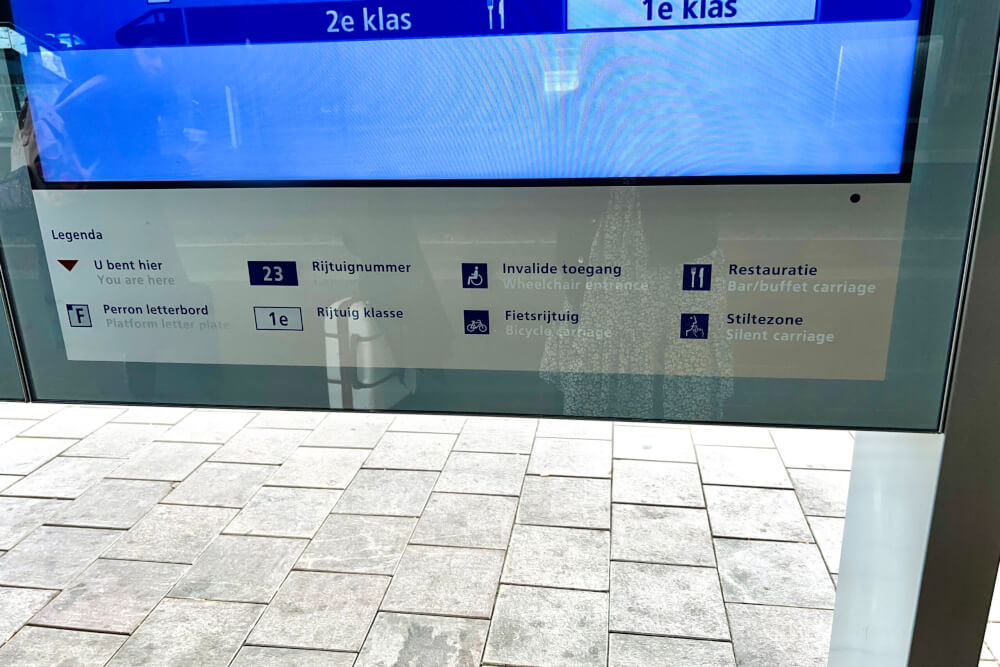
NOTE: Sometimes platforms will be marked with letters as well as numbers e.g. 4a or 4b rather than just Platform. This will help you stand on the right part of the platform because some trains are shorter and don’t stretch across the entire thing, so this is worth paying attention to.
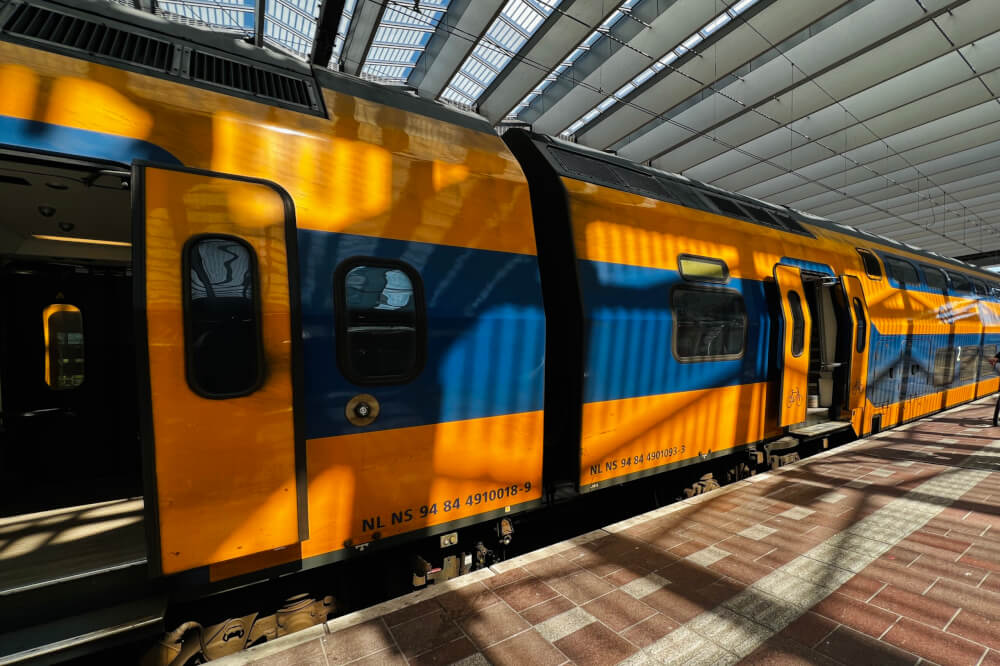
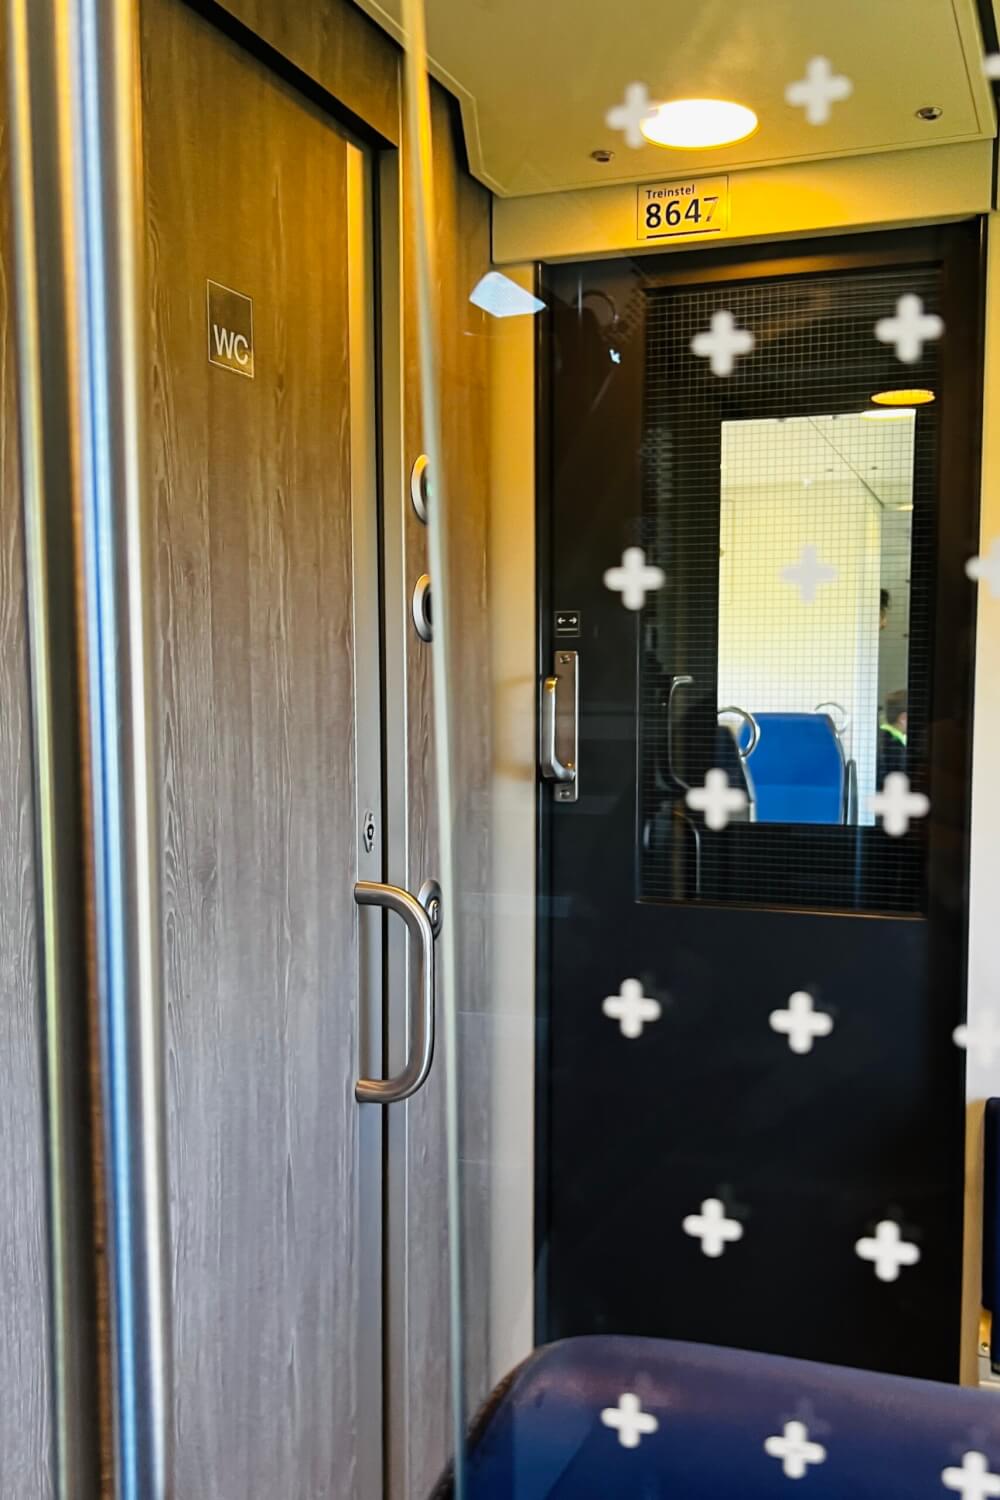
When you get onto your platform, double check it’s correct by confirming either on a screen or on the side of the train that you’re in the right place before proceeding to find your carriage…. or if you have time, maybe head to the toilet first! Sprinter trains do not have on-board toilets.
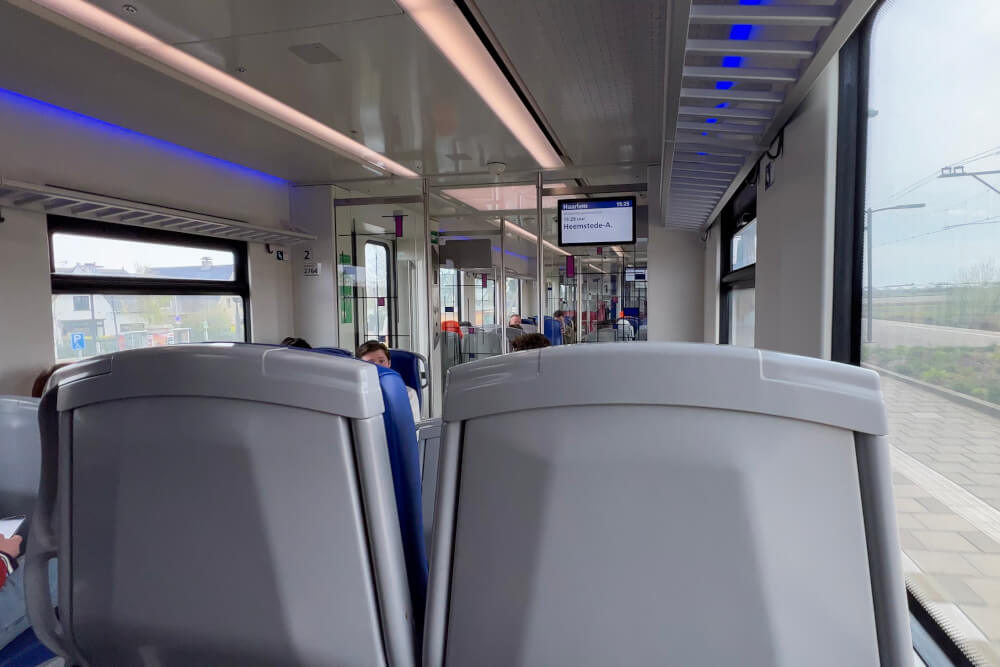
Step Six: Find Your Carriage & Seat
When the train arrives, assuming you are taking a Sprinter or Intercity train within the Netherlands and not a long distance international one like the Eurostar, then there are generally no reserved seats, so just hop onto a carriage with the class you paid for and find a free seat.
When picking a carriage to board, pay special attention to…
- The class number of the carriage (you may only board the class you’ve booked for)
- Whether they are special carriages meant for a certain purpose e.g quiet zone, bicycle zone
I find the farther you walk, the emptier the carriages will be. Some Intercity trains will also be two levels and I find that the upper levels tend to be quieter.
Once you find or choose your carriage, then it’s time to hop on board.
If the door isn’t opening then look for a circular button with <> and press it. This goes for the train doors as well as carriage doors.
When choosing a seat, make sure you avoid priority seats which are reserved for those who may need it more (e.g. elderly, pregnant or differently abled passengers).
PRO TIP: If you are travelling with luggage, it may be worth your while (on shorter trips) to stay in the area where the doors are rather than choose a seat. This will allow you to stay close to your bags while not taking up too much space.
Now onto the fun stuff…
Step Seven: Get Comfortable and Enjoy the Journey!
Dutch Sprinter trains tend to be fairly light in amenities, meaning no toilets, charging outlets or WiFi.
But Intercity trains will typically have toilets and WiFi on board, as well as quiet zones (plus work, rest, and meet and greet zones on newer trains).
If you have any questions or concerns, Dutch trains always have a conductor on board who is available to answer questions. They will occasionally also check tickets, though this is becoming increasingly rare thanks to fare gates.
Now after your journey is complete, it’s onto…
Step Eight: Disembark
If you are not getting off at the train’s final destination, then begin prepping for disembarkation about 5 min before your arrival time. This gives you plenty of time to gather your belongings and bags in a rational, non-stressed manner.
To keep track of what time you’ll be arriving, keep an eye out for screens that show the scheduled arrival time/estimated arrival time, and listen for announcements.
Upon arrival, if the door isn’t opening then again look for a button with the <> open symbol.
Once the doors are open, be careful getting off the train as there’s often a gap/step.
During this time, it’s important to keep hold of your ticket/contactless in case you need to scan it on the way out and be sure that you valuables are secure as train stations can often be a hot zone for pickpockets.
To navigate your way off the platform and onwards to wherever you need to go, keep an eye out for signs that will point you in the right direction. Luckily, Dutch train stations are VERY well signposted so your biggest problem will be quickly figuring out which sign you need. I mean, look at all those symbols:
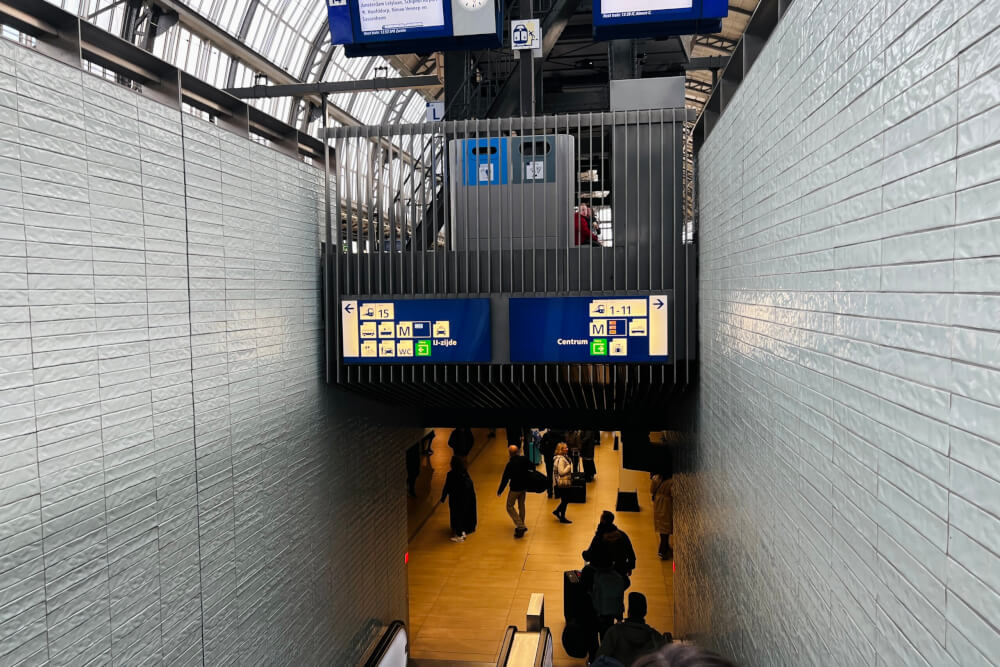
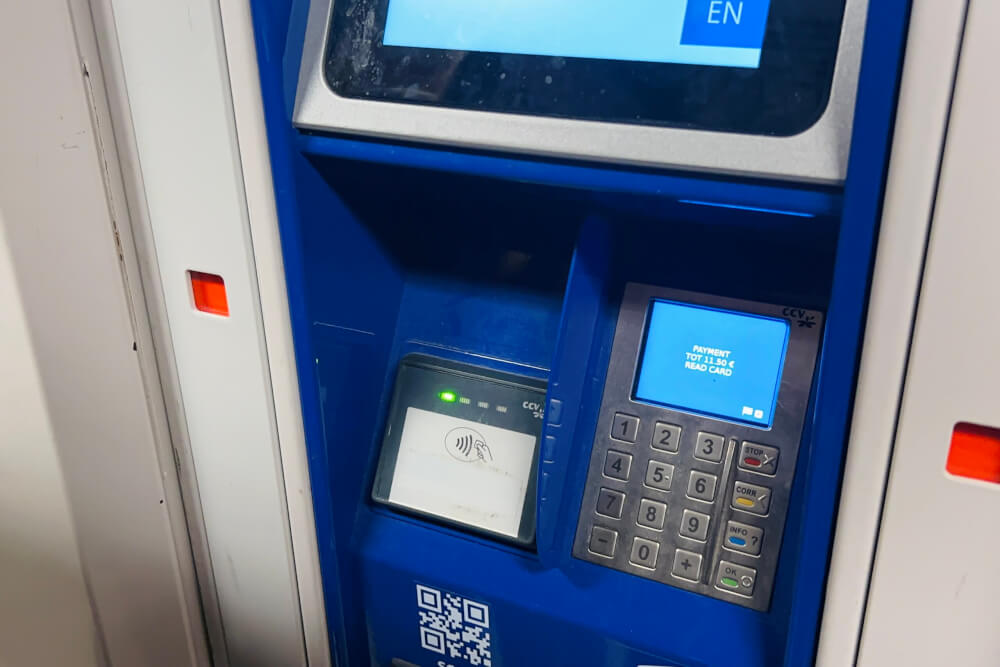
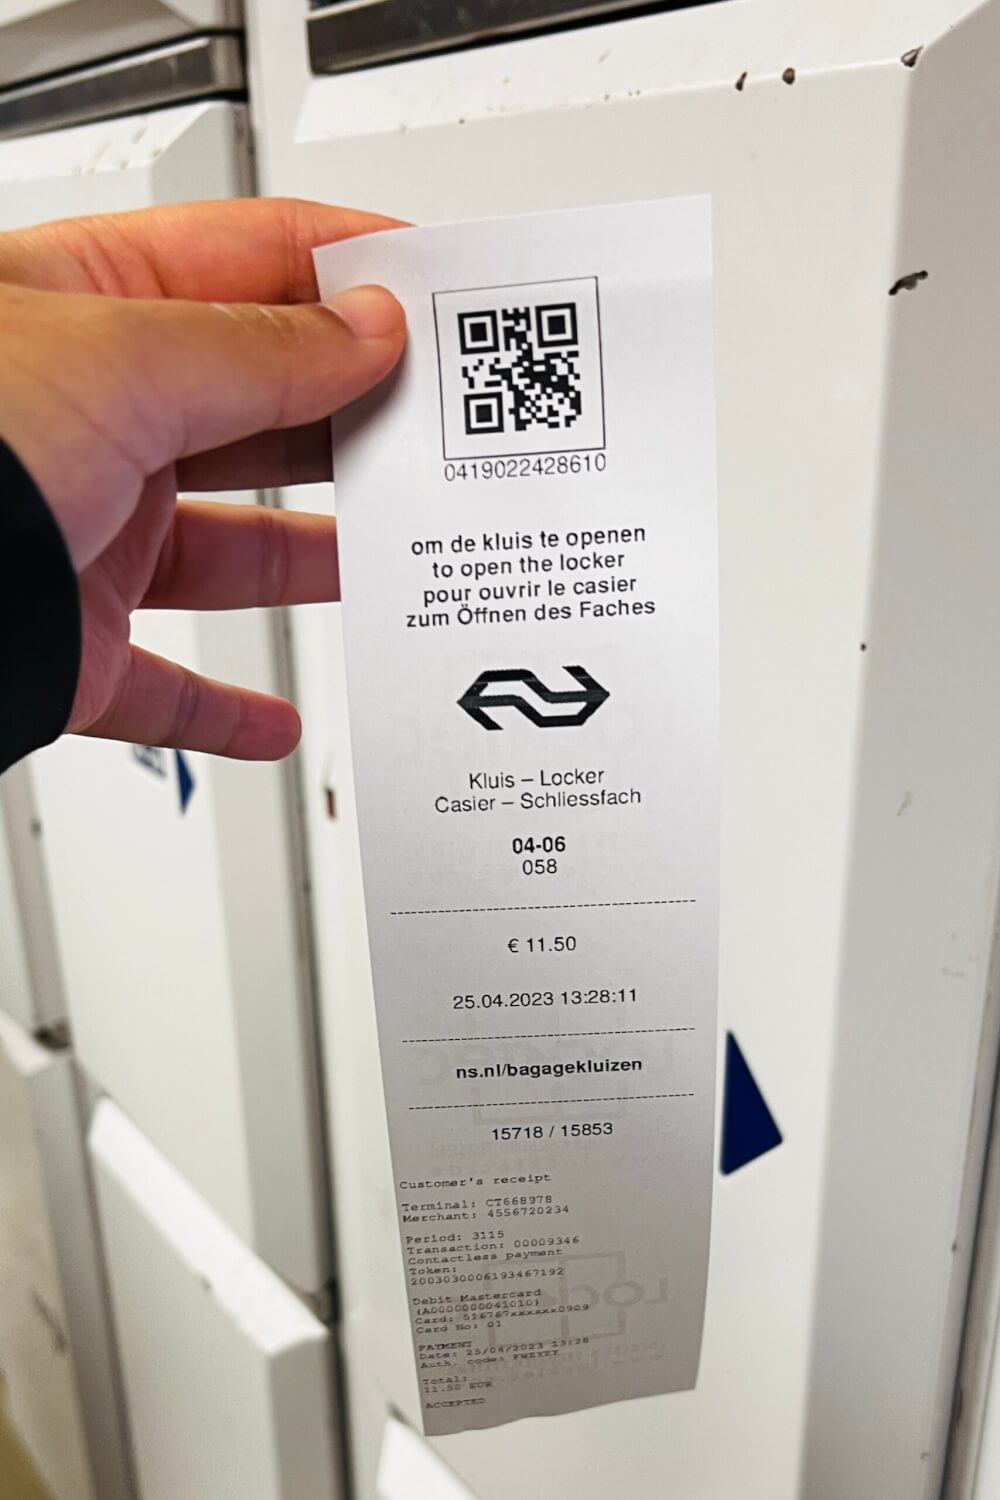
If you need a place to drop off your bags while you explore, most major train stations will have a paid left luggage area with lockers, or a drop off service.
This is a great option if you’re too early to check in to your accommodation, or just dropping in for the day.
Lastly, remember that your train ticket is usually only valid for that specific train route you booked, so you unless you bought a special ticket or pass, you won’t be able to use it for onward travel on the metro or bus.
NOTE: If your train is delayed, then you may be eligible for compensation! According to the official NS website here, delays of 30-59 minutes can mean getting refunded up to 50% of your ticket, or a full refund for delays of more than 60 minutes. To get this compensation, simply fill out a Delay Refund request on their website.
I Hope This Step by Step Guide on Taking Trains in the Netherlands was Helpful!
Let me know in the comments if you have any more questions.
Very comprehensive and helpful!