*FYI - this post may contain affiliate links, which means we earn a commission at no extra cost to you if you purchase from them. Also, as an Amazon Associate I earn from qualifying purchases. Check out our Privacy Policy and Disclosure. for more info.
If you’re an iPhone user with a trip planned this year, this post is going to rock your world.
I mean it – there is a truly annoying amount of hidden features on iPhones that make travel easier… so why don’t they tell you about them?!
Your guess is as good as mine, but rather than leave you on a cliffhanger, I’d rather just do the digging and show you exactly what you’re missing out on. From an instant way to translate signs and menus to turning your iPhone into an actual scanner for documents, this post is going to show you all the best hidden iPhone features that are perfect for travellers.
Let me know in the comments if you have more travel iPhone hacks to add!
Save this list of Hidden iPhone Travel Hacks for Later!
You’ll be very glad you did.
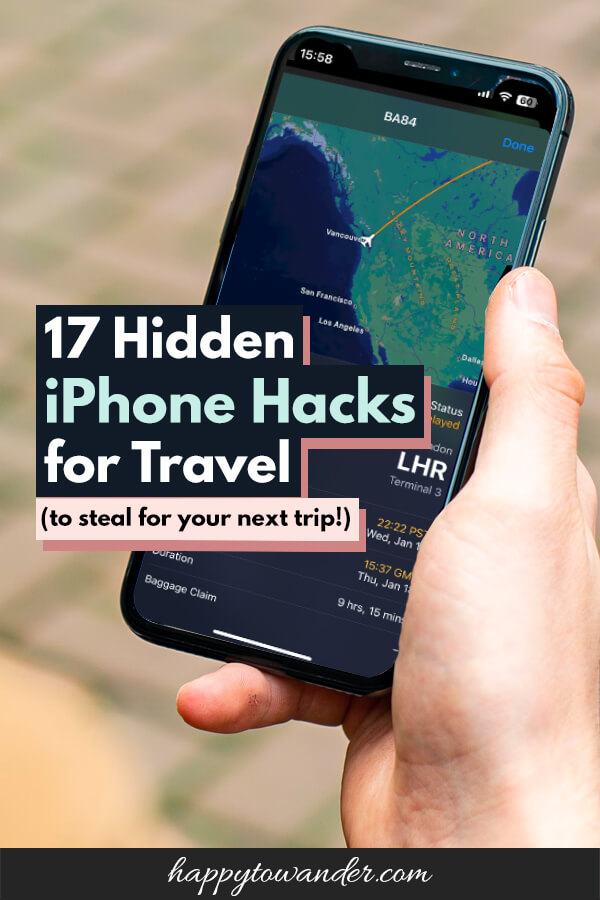
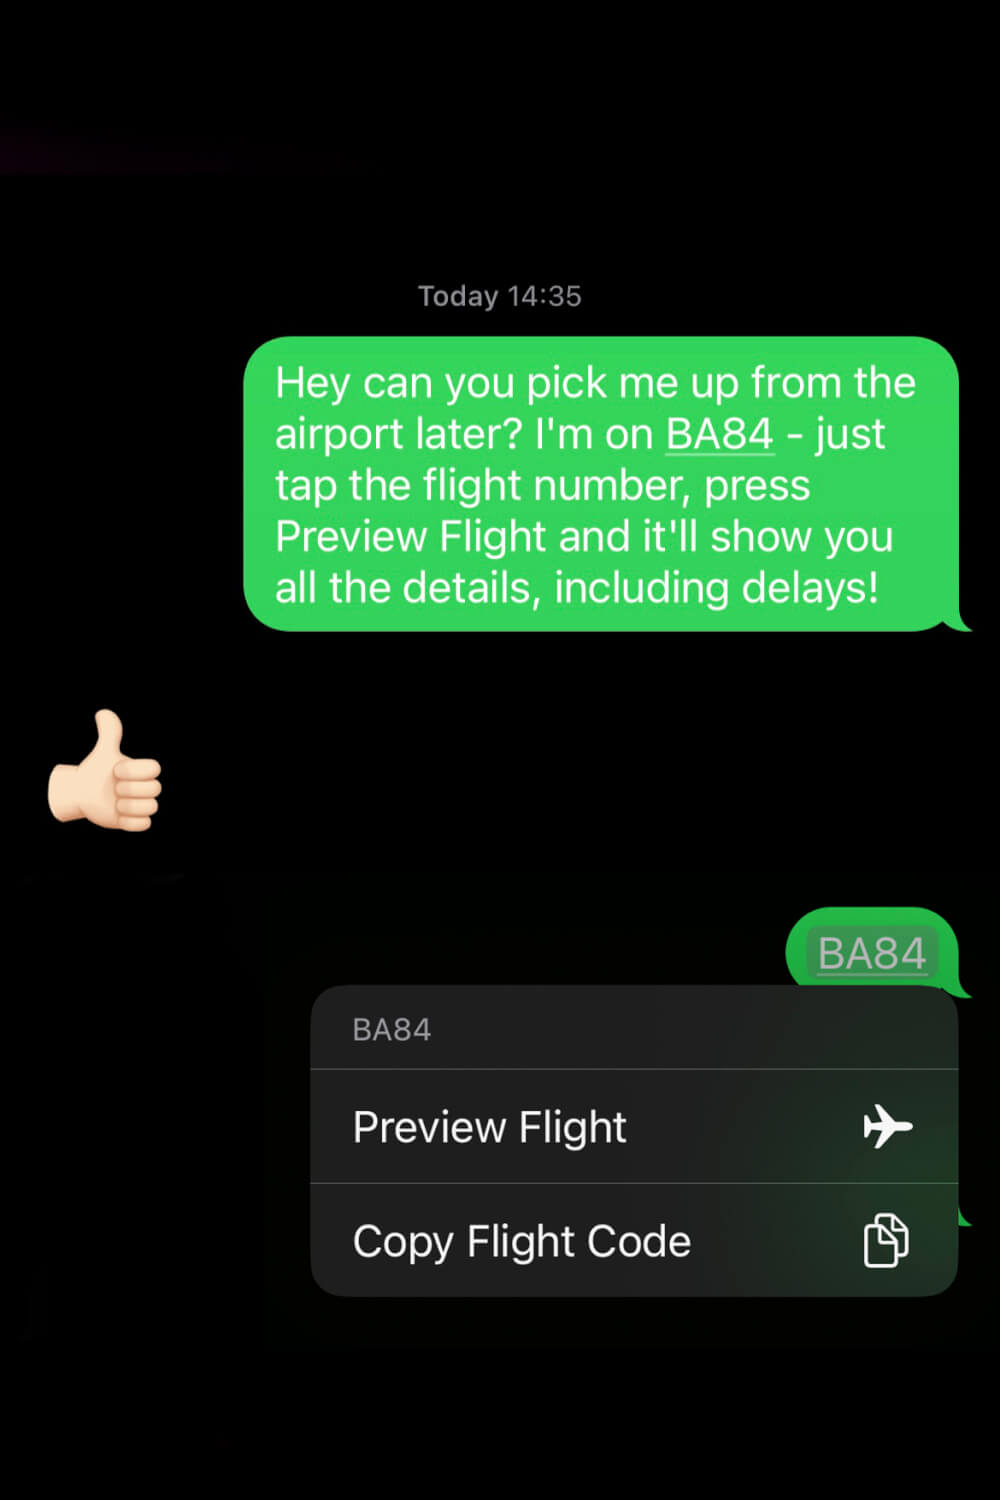
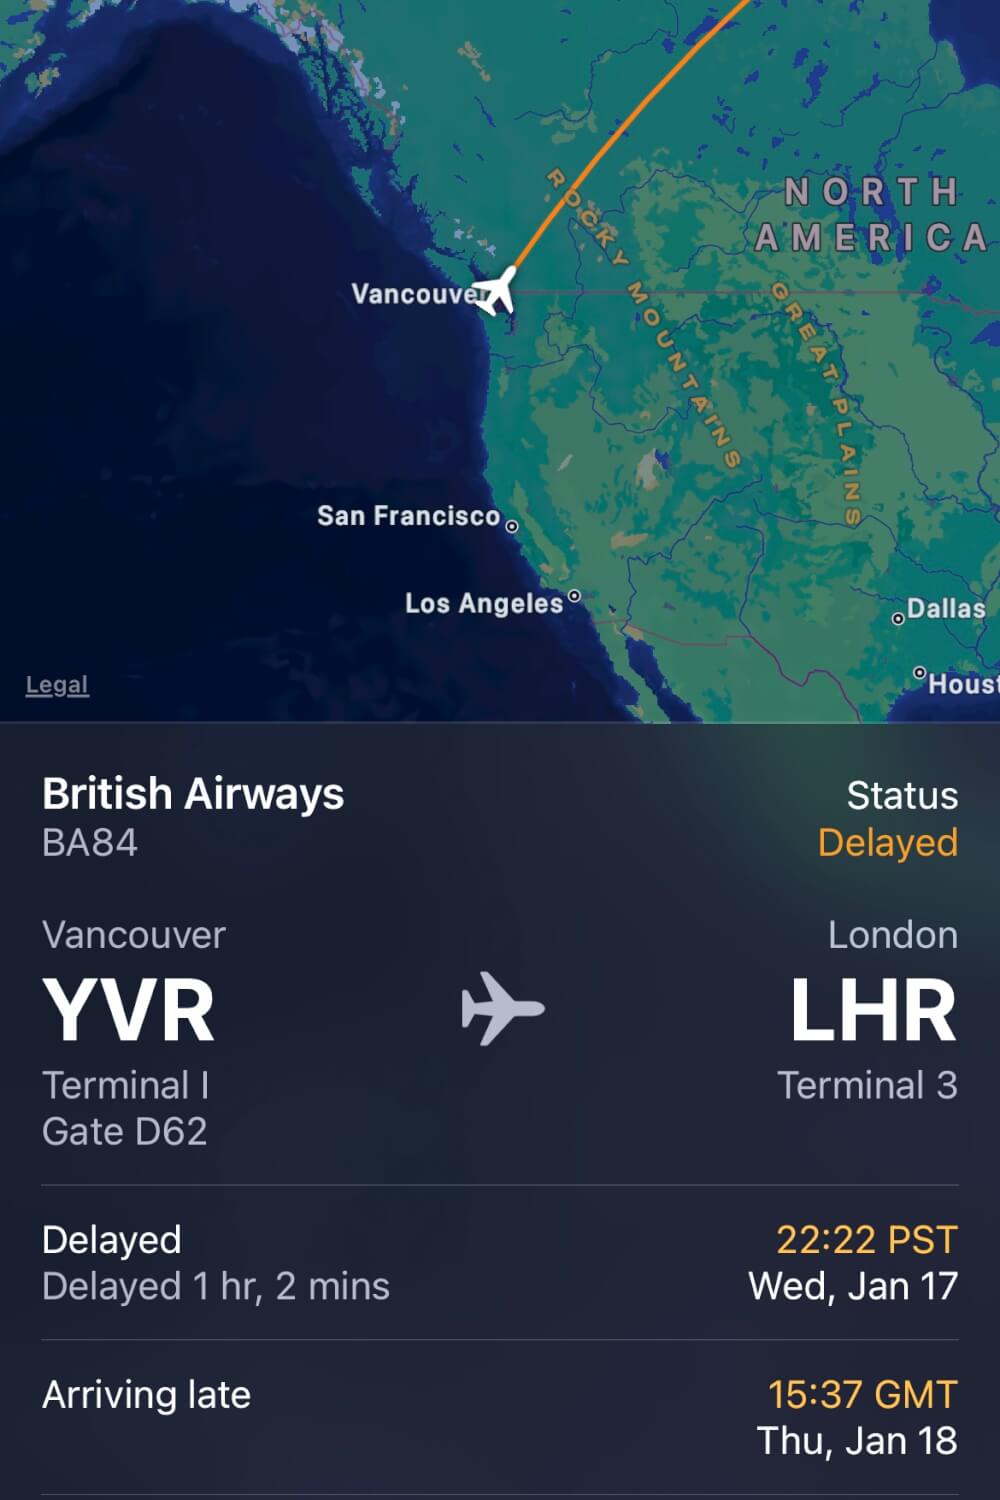
1. Send flight details in seconds
First, let’s start with a simple way to send your flight details to anybody in seconds. This is especially helpful if you’re getting picked up at the airport or just want to keep loved ones in the loop.
HOW TO USE THIS HIDDEN FEATURE: Text someone your flight number, then when they tap on the underlined part, there will be an option to “Preview Flight”. Press that and all the info (including delays and where you are en route) will pull up. Magic!
2. Translate signs and menus using just the iPhone camera
Another amazing iPhone feature for travel can be found right in your camera.
Yes, forget about Google Translate – all you need is your camera and you’ll have signs, menus, and documents translated in seconds.
HOW TO USE THIS HIDDEN FEATURE: Pull up your iPhone camera and place it over any sign, menu or document. Wait for the Live Text icon to activate in the bottom right hand corner, press that, then a Translate button will appear. Press this button and the image will translate to your language immediately.
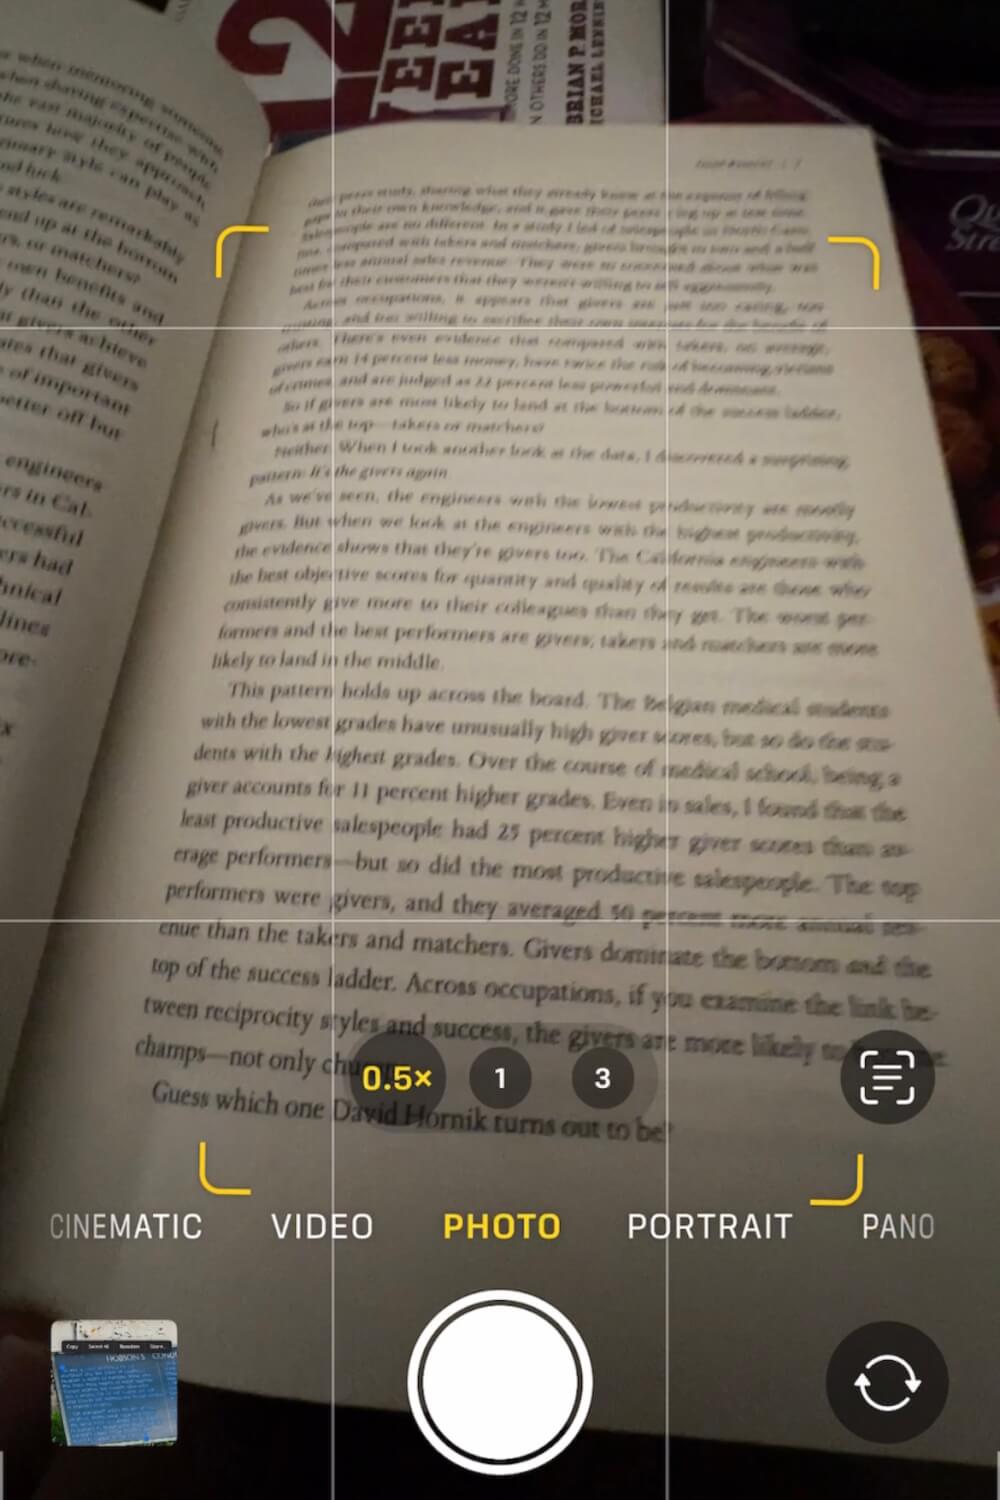
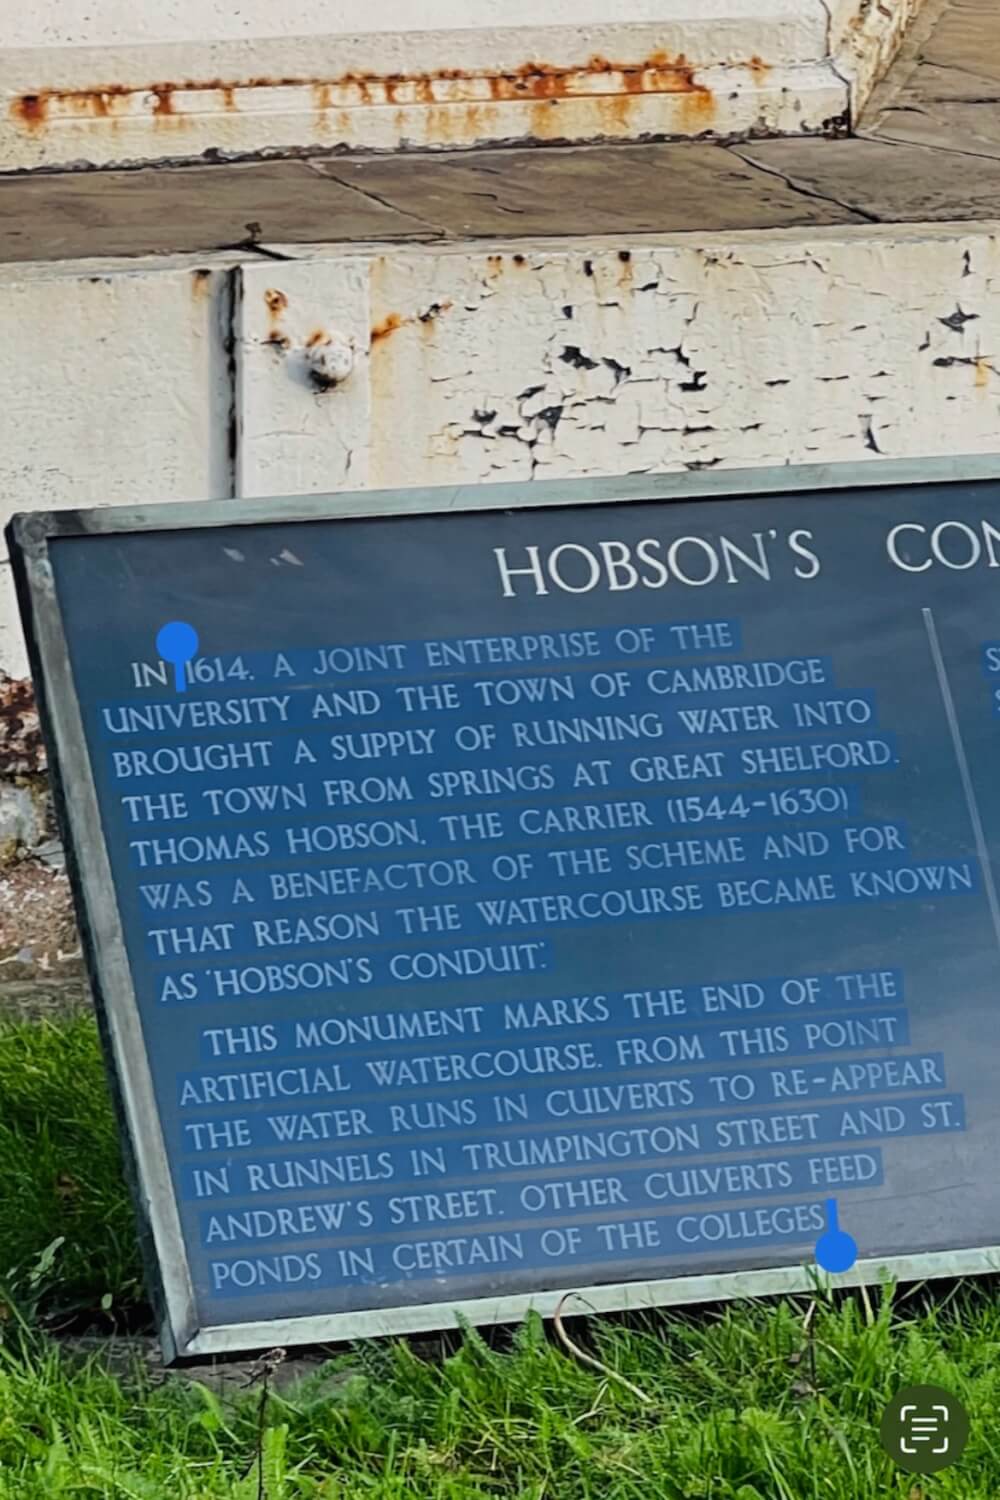
3. Copy text using the iPhone camera
Another great trick with the iPhone camera is that you can easily use it to copy text, whether that’s from a book, sign or… historic plaque, if you’re a nerd like me.
HOW TO USE THIS HIDDEN FEATURE: Open your camera, put it on photo mode and place it over the text you want to copy. Then tap the screen where your text is until a yellow frame appears around it, and press the button on the bottom right hand corner to open up the text in a copyable form. A new screen will appear that allows you to select whatever bits of the text you want, and then you can tap again to copy it and paste it into your notes/messages.
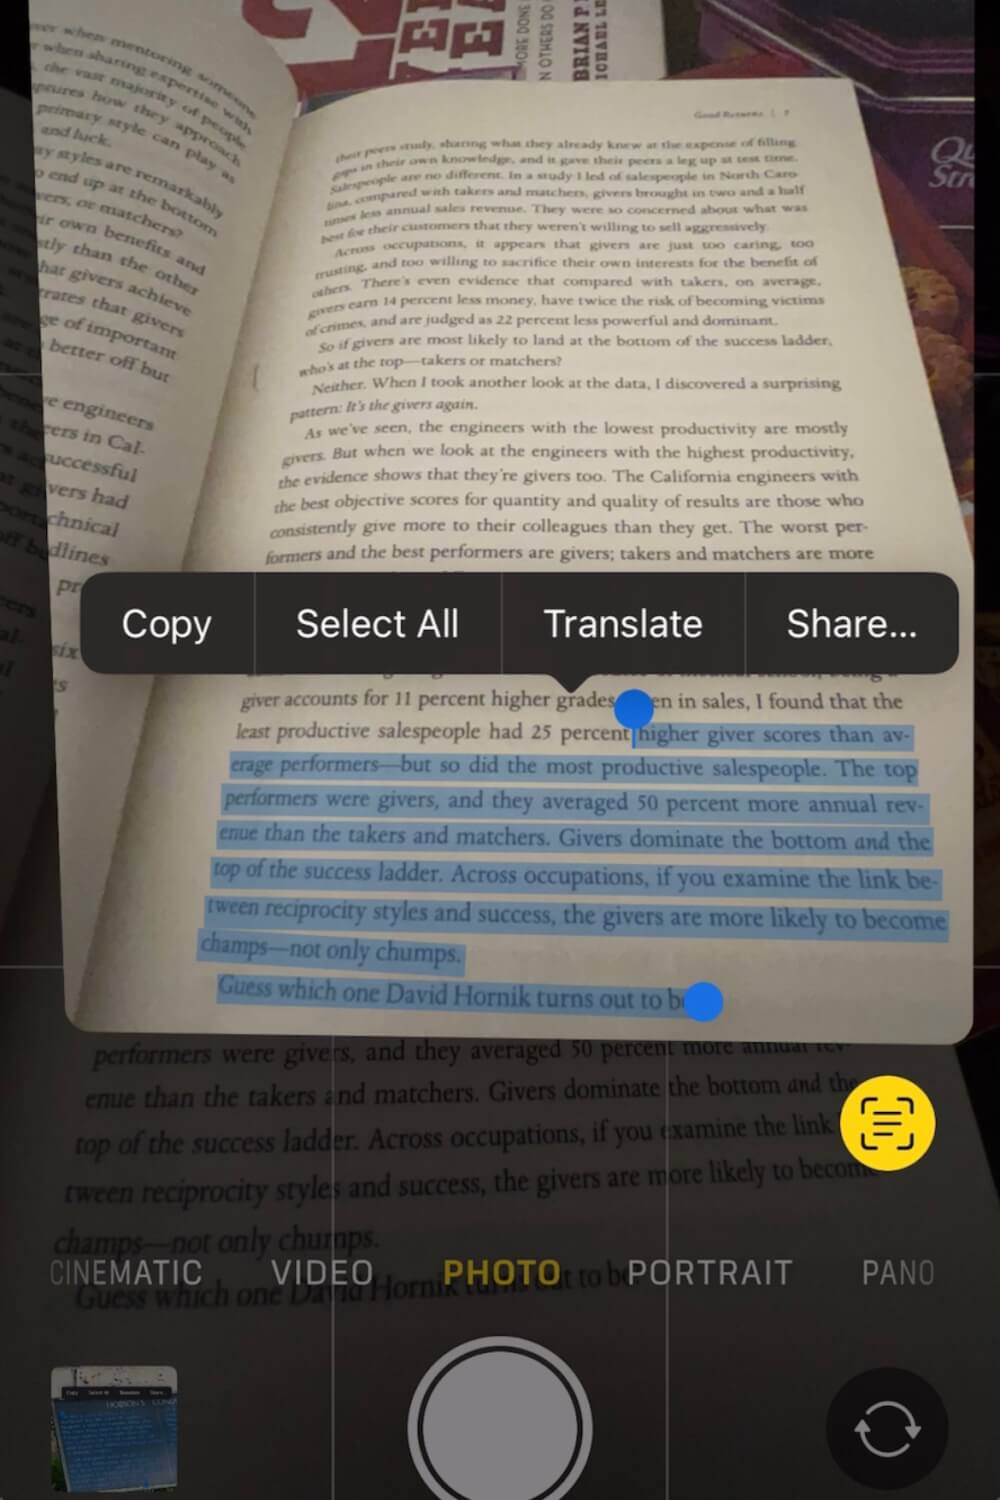
This is great for note taking if you plan to write about your trip, or if you just want to share some bits of info with people back home. I use it for big signs or plaques all the time that I don’t have time to read, so I can reference back on them later.
The best part is, this also works for photos you’ve already taken.
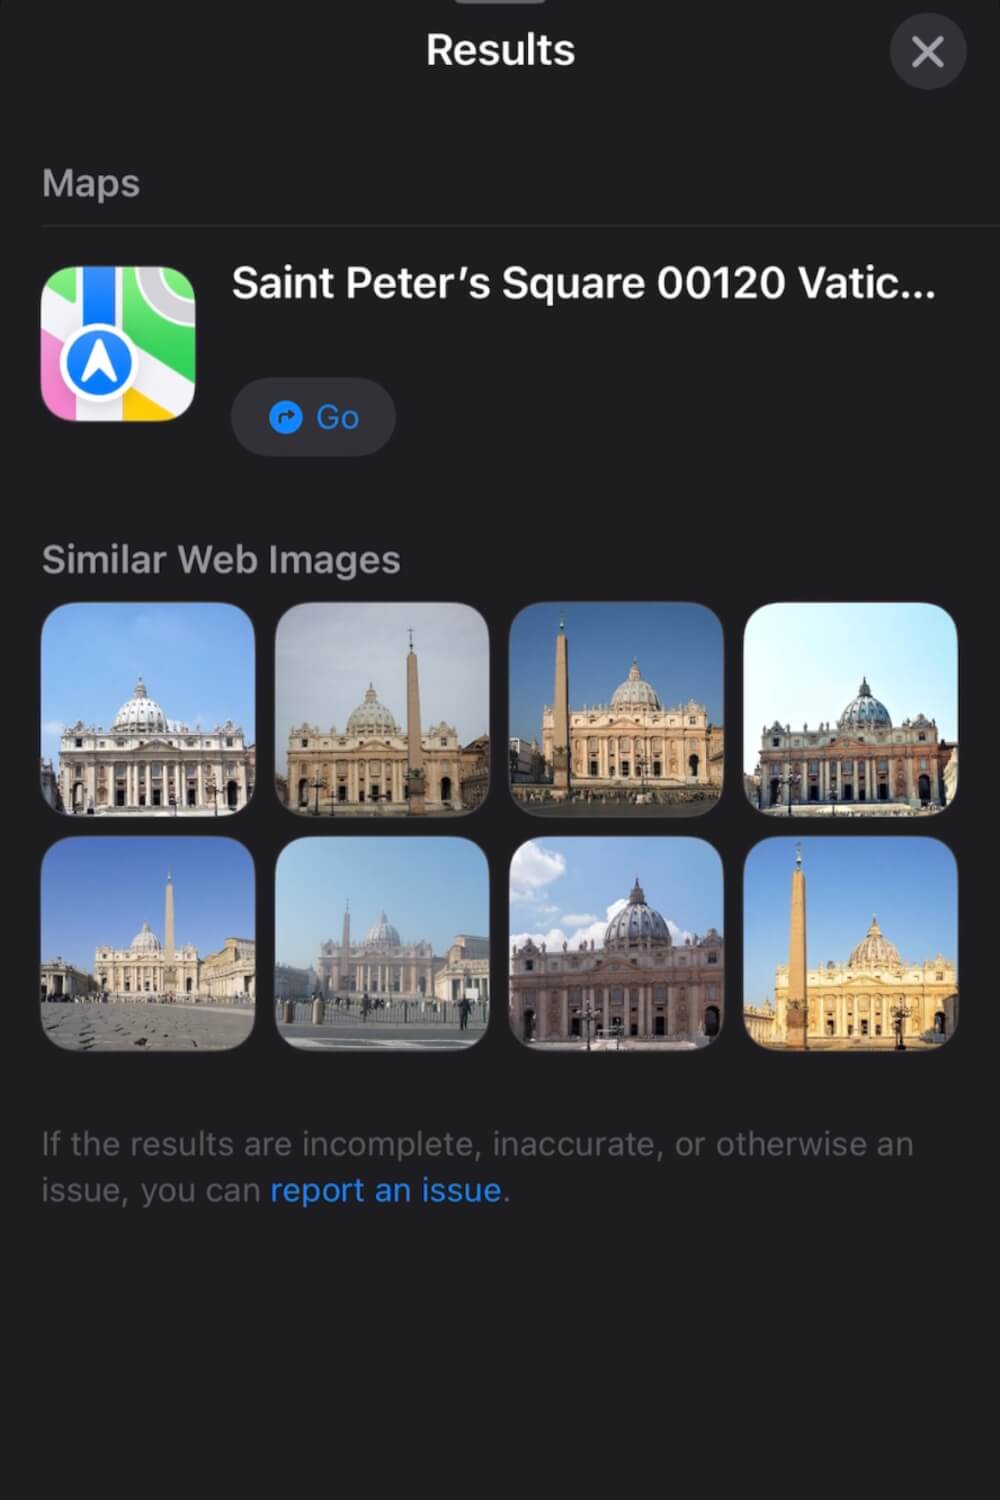
4. Look up landmarks within your camera roll
If you’re like me and have the memory of a goldfish, this next hidden iPhone trick is such a gamechanger.
Long story short, if you take a photo of a landmark, and you can’t remember exactly what it was, then you can actually find the answer right in your camera roll through the ‘Look up Landmark’ feature.
HOW TO USE THIS HIDDEN FEATURE: Swipe up in the photo and look for something that says “Look up Landmark”. Press it and wait for the results.
If it’s something very iconic and famous, it’ll often show you exactly what it is (name and all), otherwise it may just give you the address and then you’ll have to look up the full name on Maps. Either way, really handy for remembering where you went.
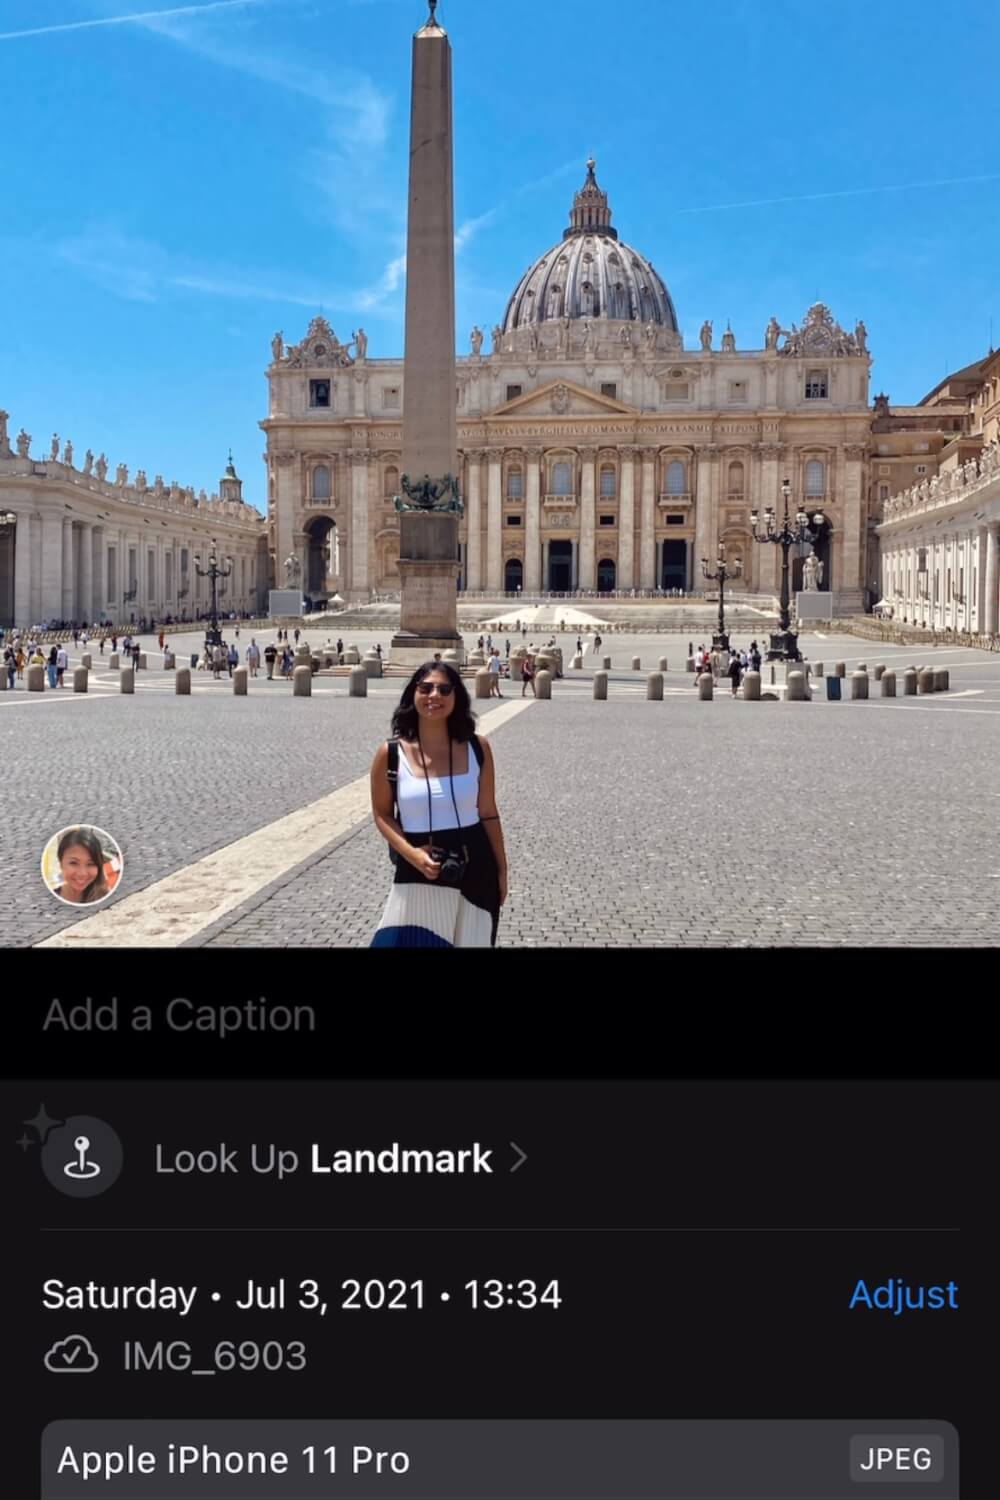
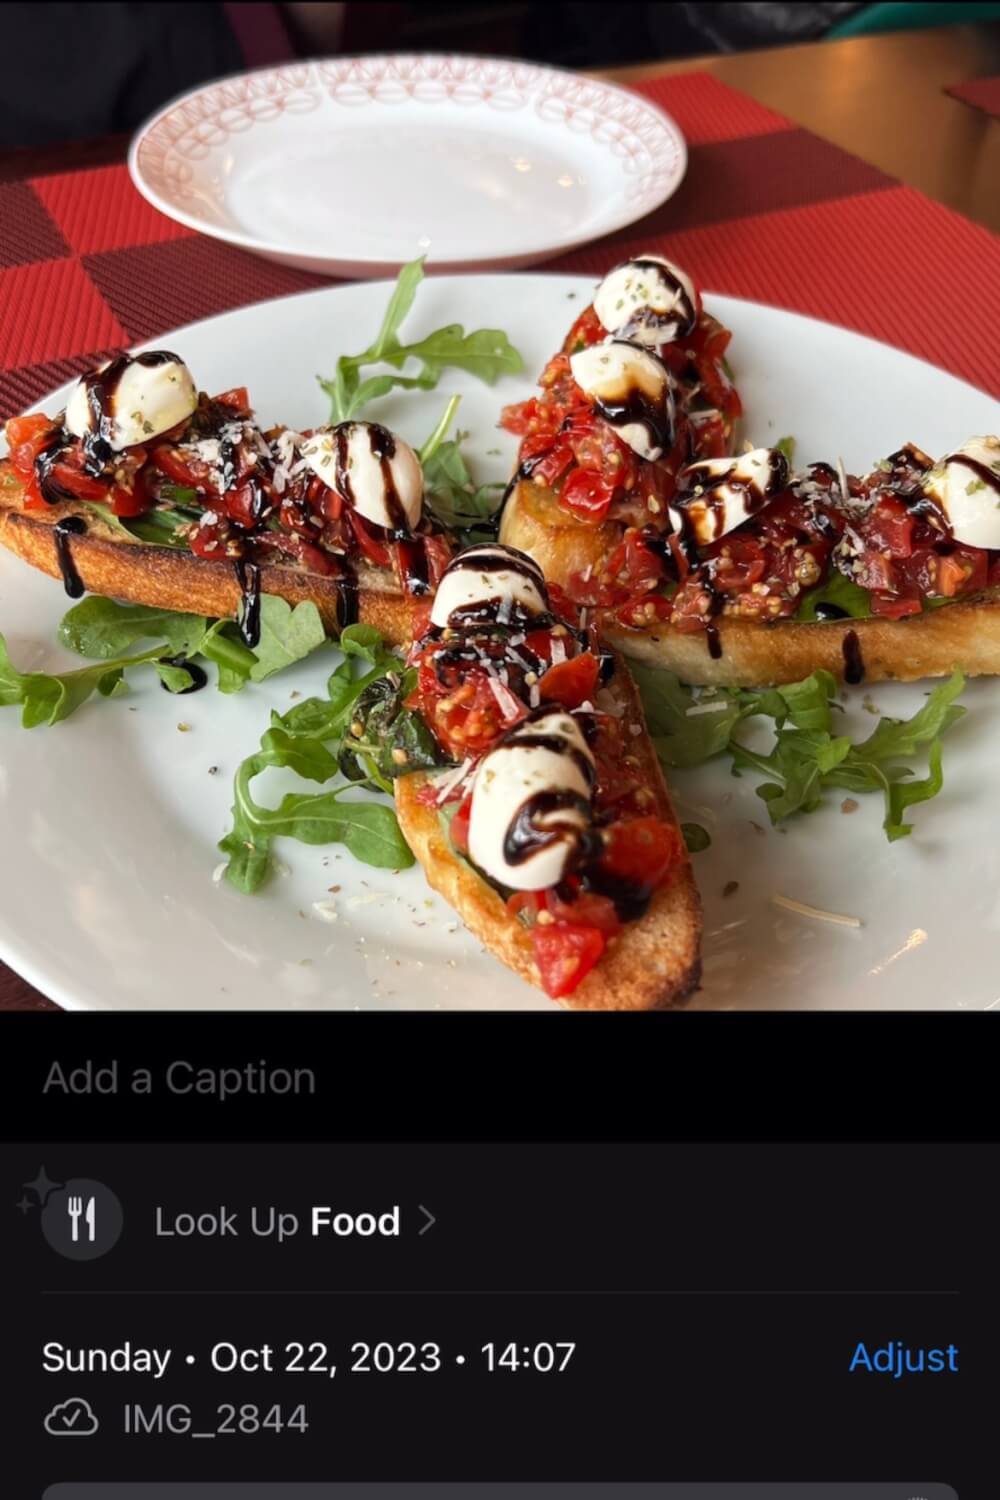
5. Add captions to Camera Roll photos
Another iPhone feature people forget about is the ability to add a caption.
Yes, captions! Just like on Instagram or Facebook.
So let’s say you want to remember little bits from your trip, like the specific name of the dish you ordered or maybe the names of the tour guide or friends you met, you can do so right within your Camera Roll.
HOW TO USE THIS HIDDEN FEATURE: Go to the photo you want to add a caption to. Swipe up and then an “Add a caption” box should appear right below the photo.

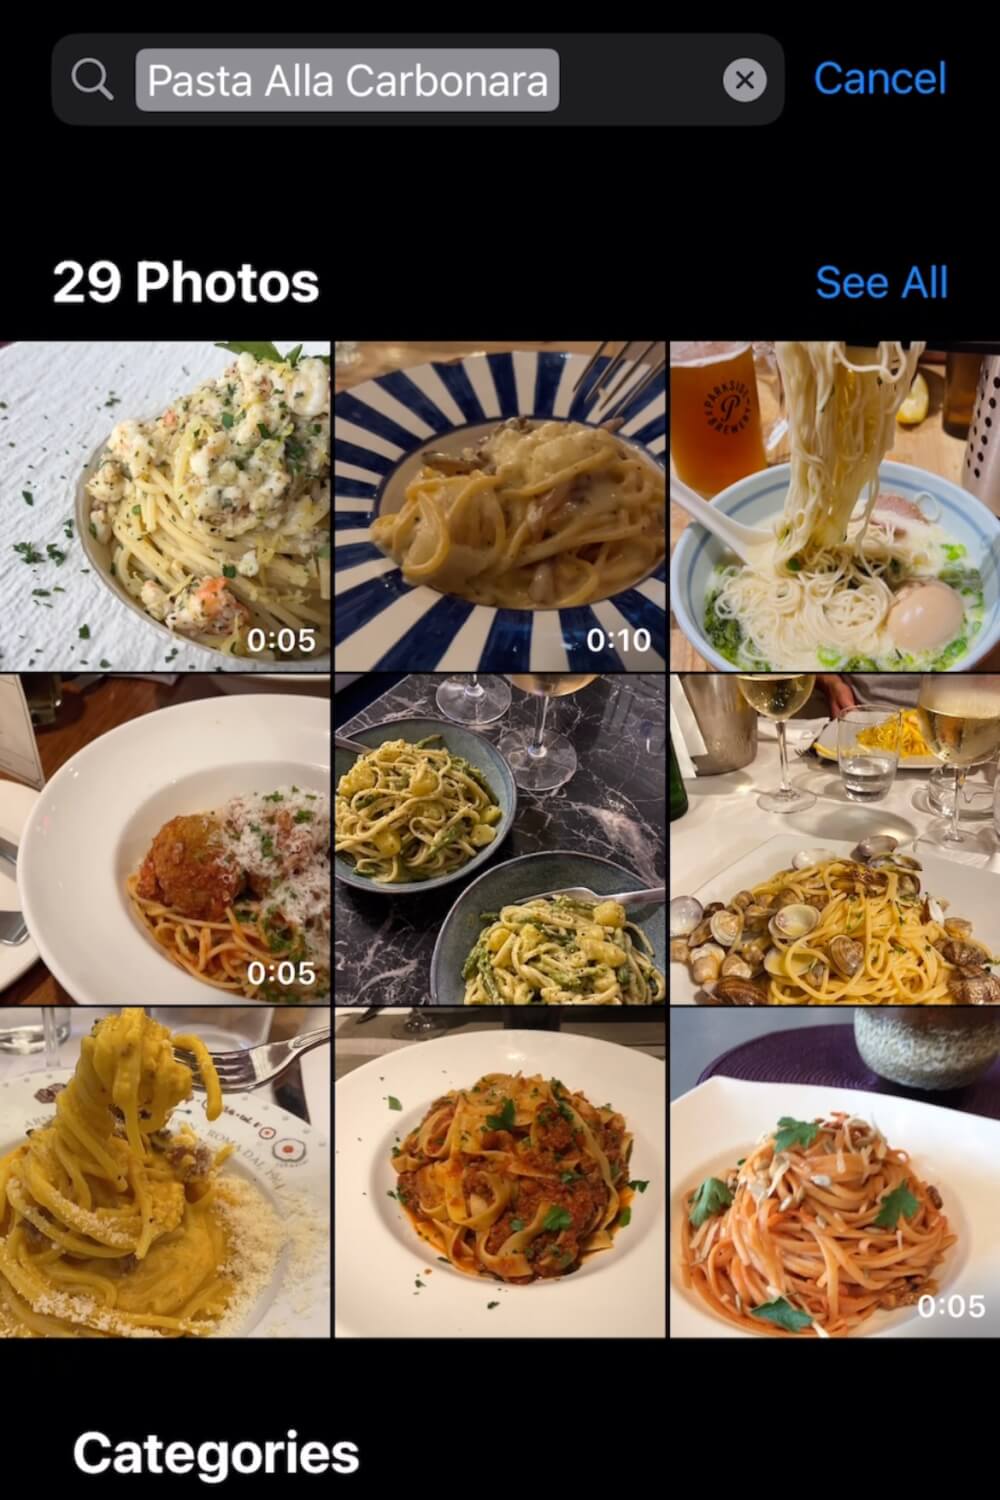
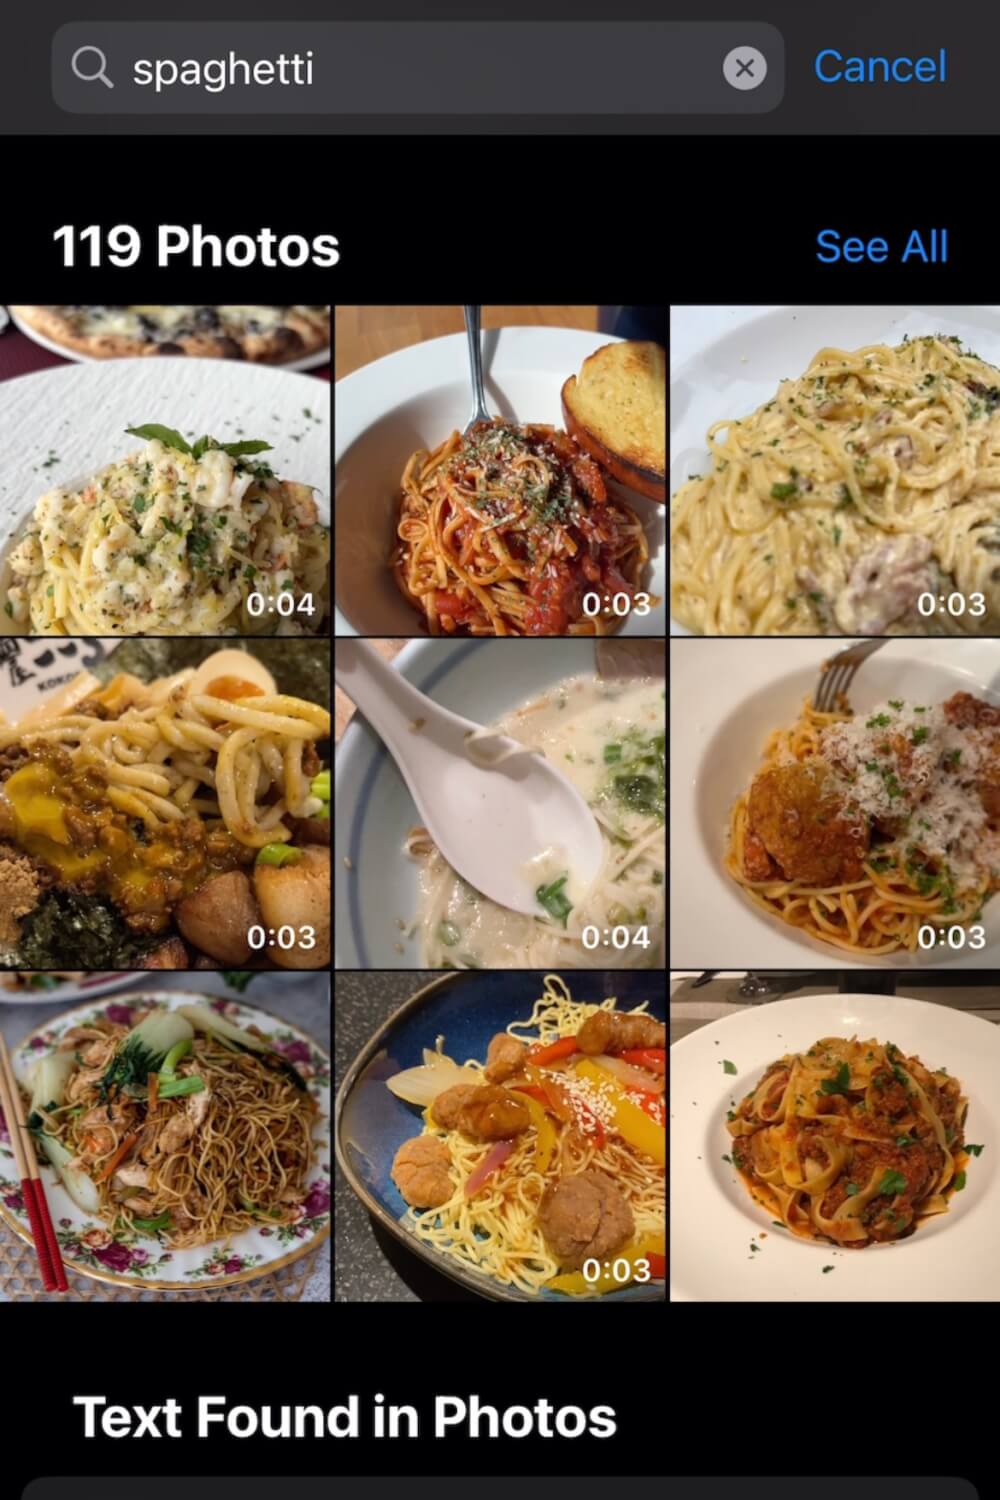
6. Find Camera Roll photos easily with specific search terms
And if you want to find a specific photo from your trips, but can’t recall exactly when it was taken, the Photos app has a nifty solution.
Yes, in case you didn’t know, you can actually search for specific items in your Photos app, whether you’re looking for photos of coffee, pasta, or other important non-consumable things.
HOW TO USE THIS HIDDEN FEATURE: Open your Photos app and look for the Search button on the bottom right hand corner. Tap it then type in what you’re looking for. Granted, it’s not perfect (it’ll give you ramen when you search for spaghetti, for example) but it can save you a lot of time if you’re trying to hunt down a specific photo of something.
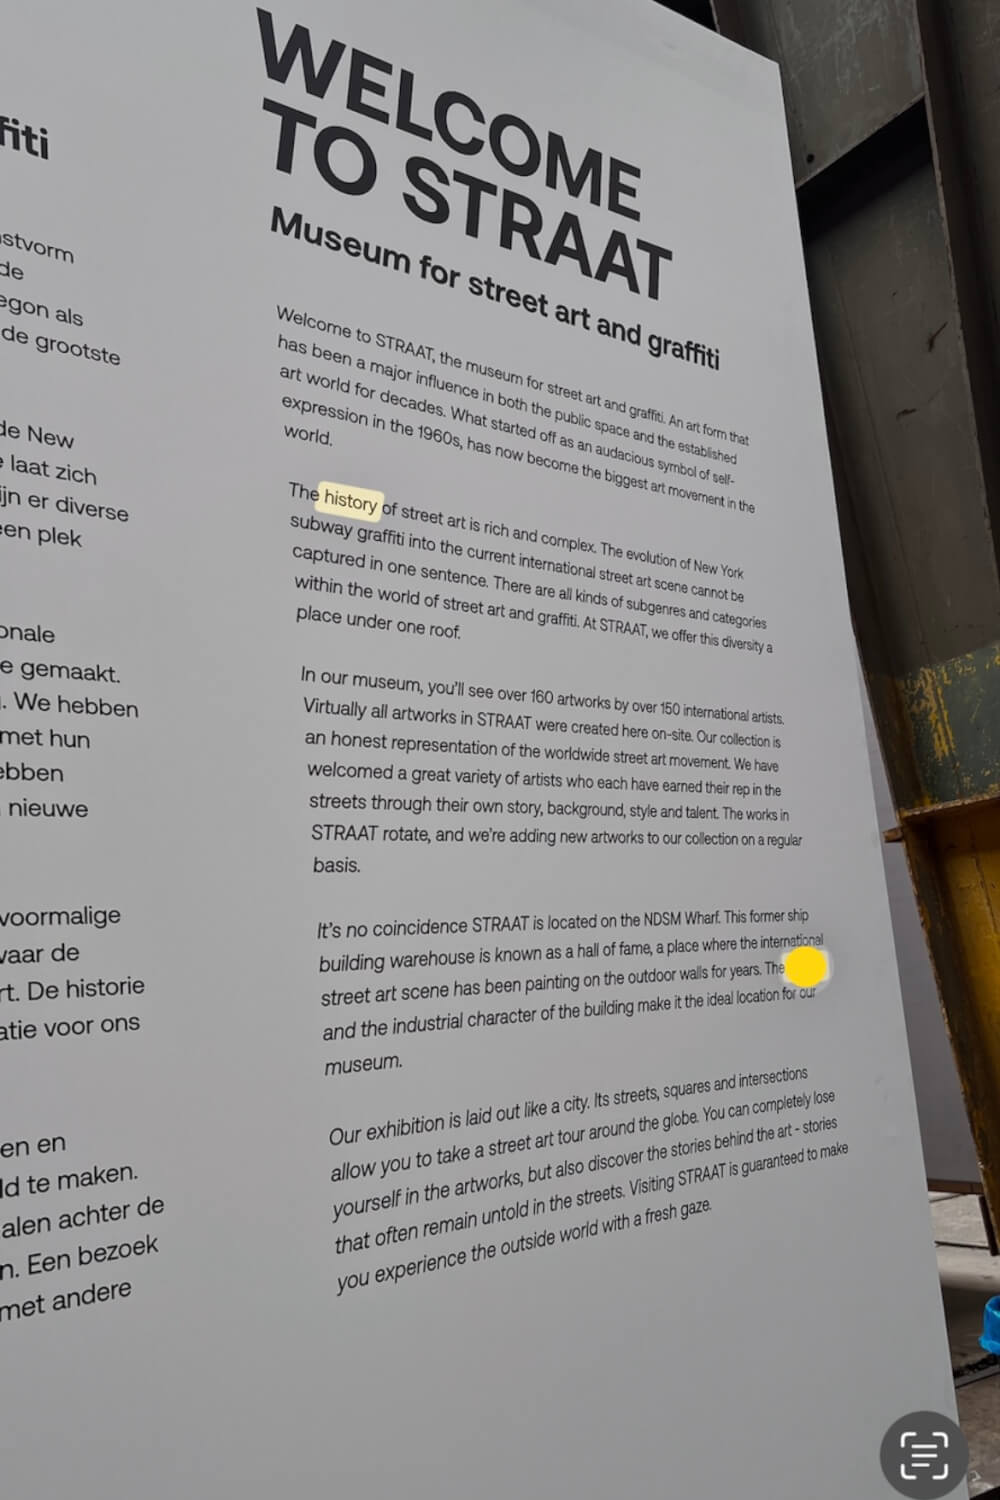
BONUS TIP: You can also search based on the text that’s present in that photo, so let’s say you’re trying to locate a specific sign or something, you can type in the word you’re looking for, then press the search results with the live text symbol to reveal the photos that contain that word. It’ll even highlight it on the photo for you which is wild.
7. Easily extract subjects from their backgrounds in photos
Ever wanted to cut yourself out of a photo, whether for collages or just for funsies?
The iPhone has a super easy way of doing that.
HOW TO USE THIS HIDDEN FEATURE: Hold down on a photo in the spot that you want to cut out, then wait for a glowy line to appear it, and press copy. You can then paste this in your Notes or on Instagram Stories.
There’s a lot of different potential uses for this – from silly creative things like making collages for social media to more practical purposes like documenting outfits for a trip. I know some people who will take a mirror selfie of various outfits then keep an outfit Note so they can (at a glance) see all their outfit options based on what they’ve packed.
It seems like overkill but it’s also really smart if you’re a big planner.

8. Unlock the secret mode for taking videos and photos at the same time
Okay, honestly, this hack blew my mind when I found out about it, so I hope you’re excited.
Long story short: if you want to capture video and photos at the same time while you’re out exploring, then there actually is a secret mode you can unlock to do this.
HOW TO USE THIS HIDDEN FEATURE: Open your camera app and go to the video tab, then press down on the red button at the bottom and drag it straight over to the right and drop it there. A white circle should now appear in the bottom left, and you can now press that white button to capture a still frame from the video even while you’re recording.
Now, beware that this would be similar quality to screenshotting from a video and so if sharp photo quality is important to you, you’re better off taking your photos and videos separately, but it’s a cool option if you’re crunched for time!
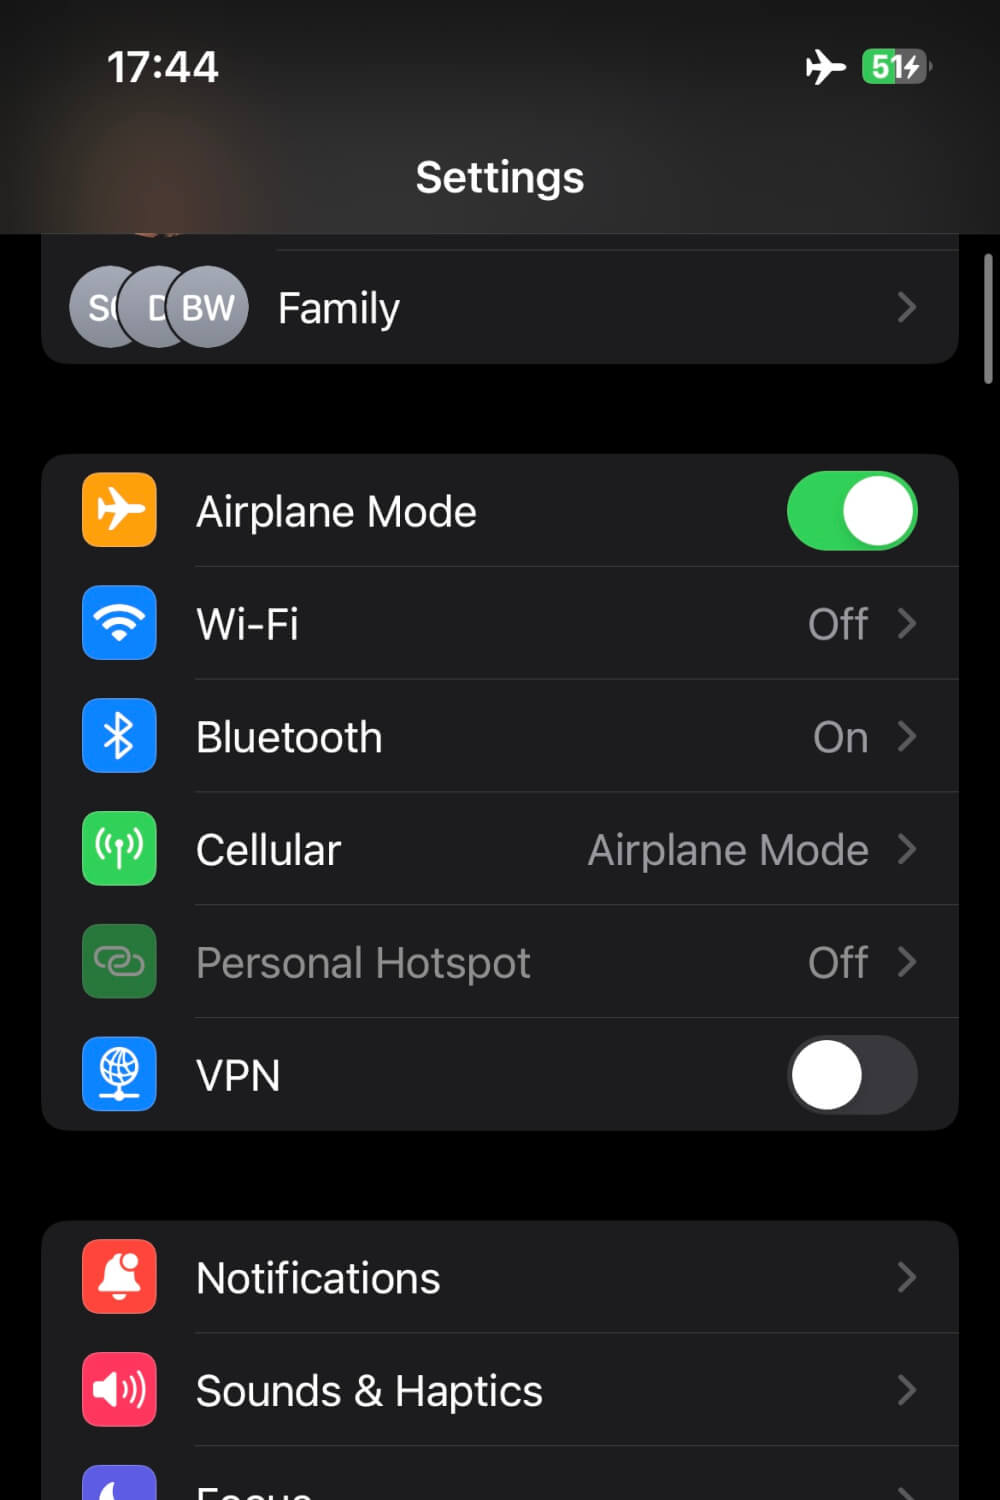
9. Charge phone faster by putting on airplane mode
This is a simple iPhone trick that I think is fairly commonly known, but just in case you ever need to charge your phone quickly (e.g. at the airport or something), a great way to make it charge MUCH faster is by putting it on airplane mode and leaving it.
Don’t ask me why this works. I’m not a scientist.
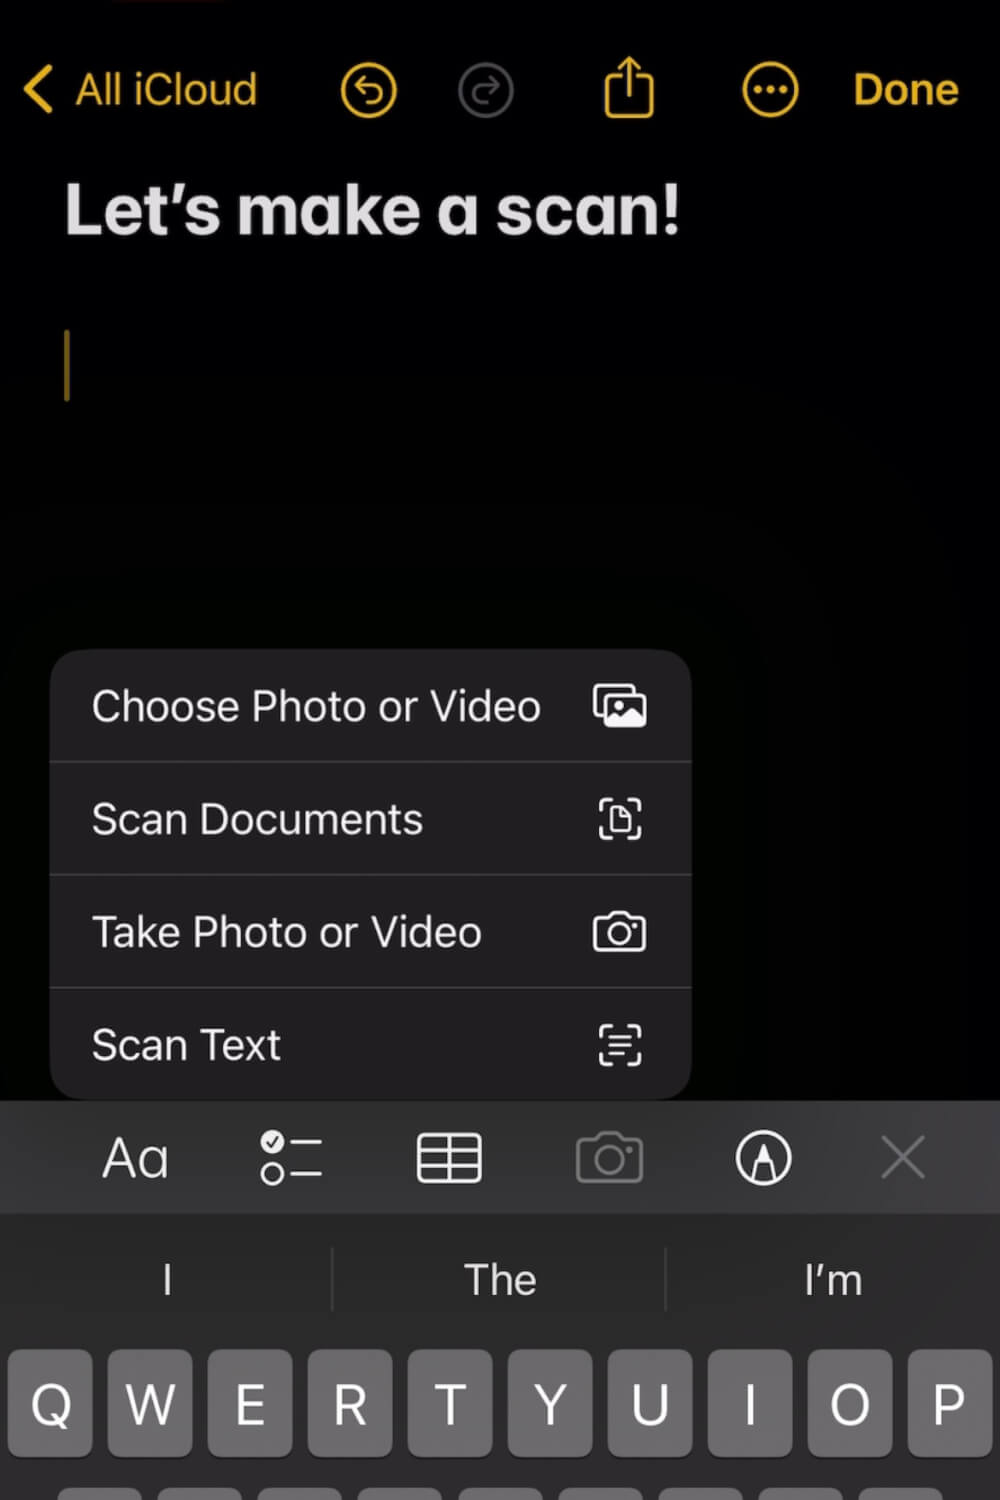
10. Use the Notes app as a scanner
Now, here’s another mindblowing trick… If you have any documents that you need to scan or make copies of before your trip (e.g. your passport), you can actually use your iPhone Notes app as a high quality scanner.
HOW TO USE THIS HIDDEN FEATURE: Open up your Notes app, tap the camera button, then go to ‘Scan documents’. This will open up a camera. Then, place your phone over the document like you’re taking a photo of it and press the big white button at the bottom. At this point, it will scan a copy and turn it into a pdf right in your Notes app.
During the process, you can even choose specific details for your scan like whether it’s colour, black and white, greyscale or a photo.
Once the scan is done, to change the name, you can press the title and click Rename. You can also get it on your computer by Airdropping, or emailing it through the Share button.
Before a big trip, I would personally make some scanned copies of any important documents like your passport, travel insurance, and any other physical bookings or tickets.

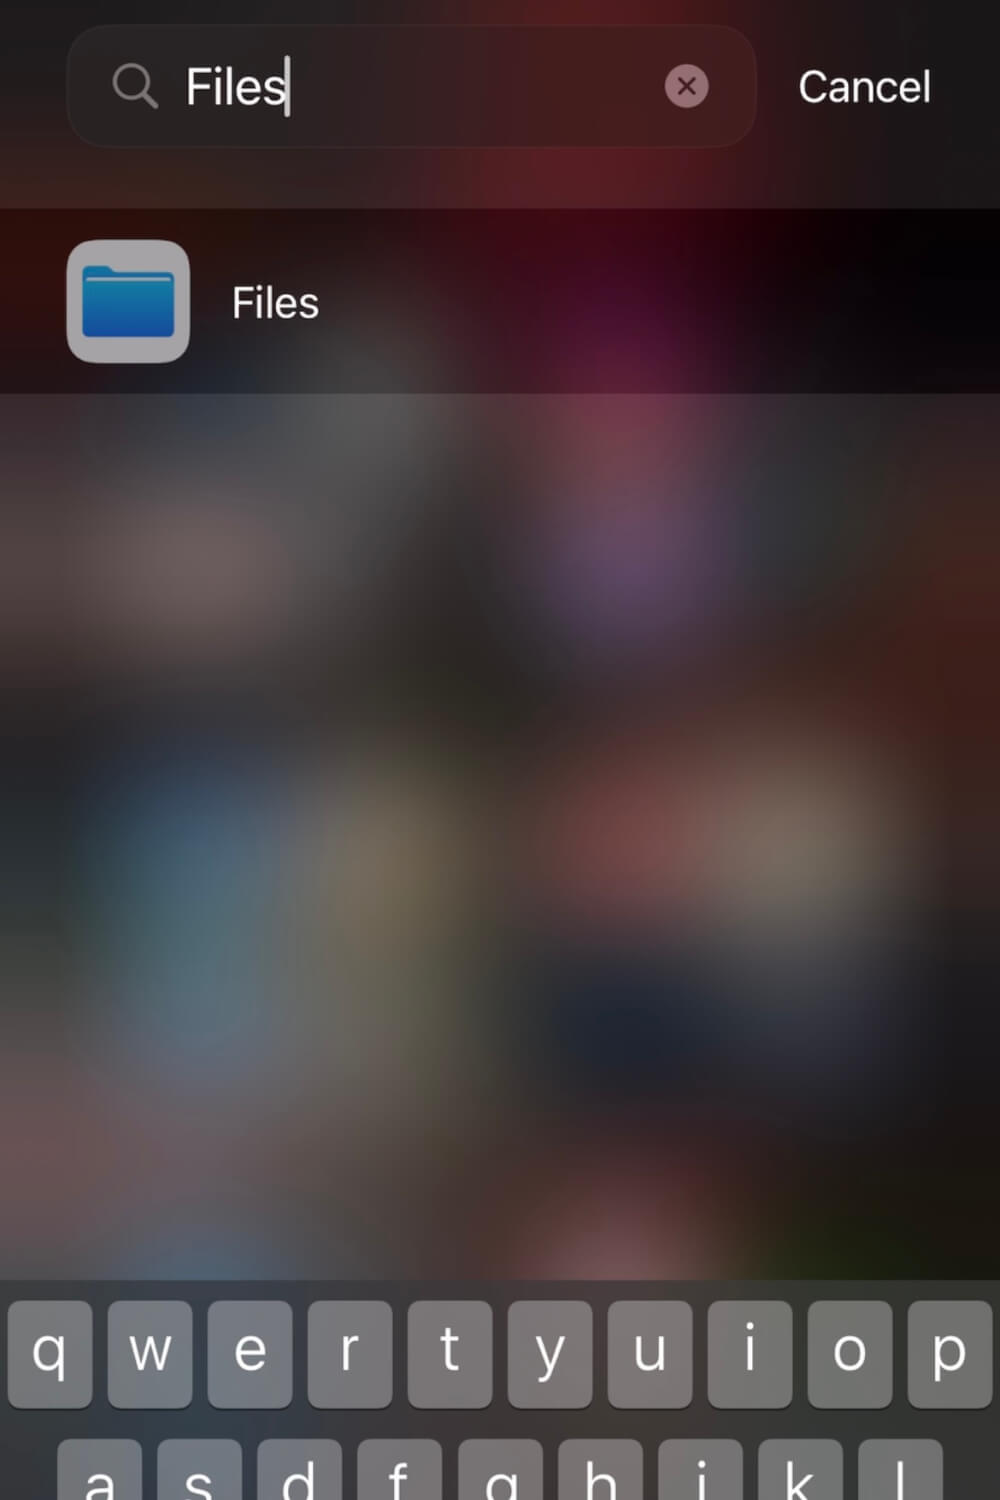
11. Save copies of important documents in files
Another iPhone trick I’d recommend for travel is saving copies of your important documents in your Files folder. Everybody knows about the Photos app on your iPhone but far fewer people realize that you can actually keep Files as well like PDFs or other documents.
Since the Files folder gets a lot less use, that’s where I keep important things like copies of my passport because I know it’ll be easy to find (compared to my camera roll at least).
So, if you’re using that scanner trick from before, you can press Share, then Save to Files in order to keep a copy in your Files app.

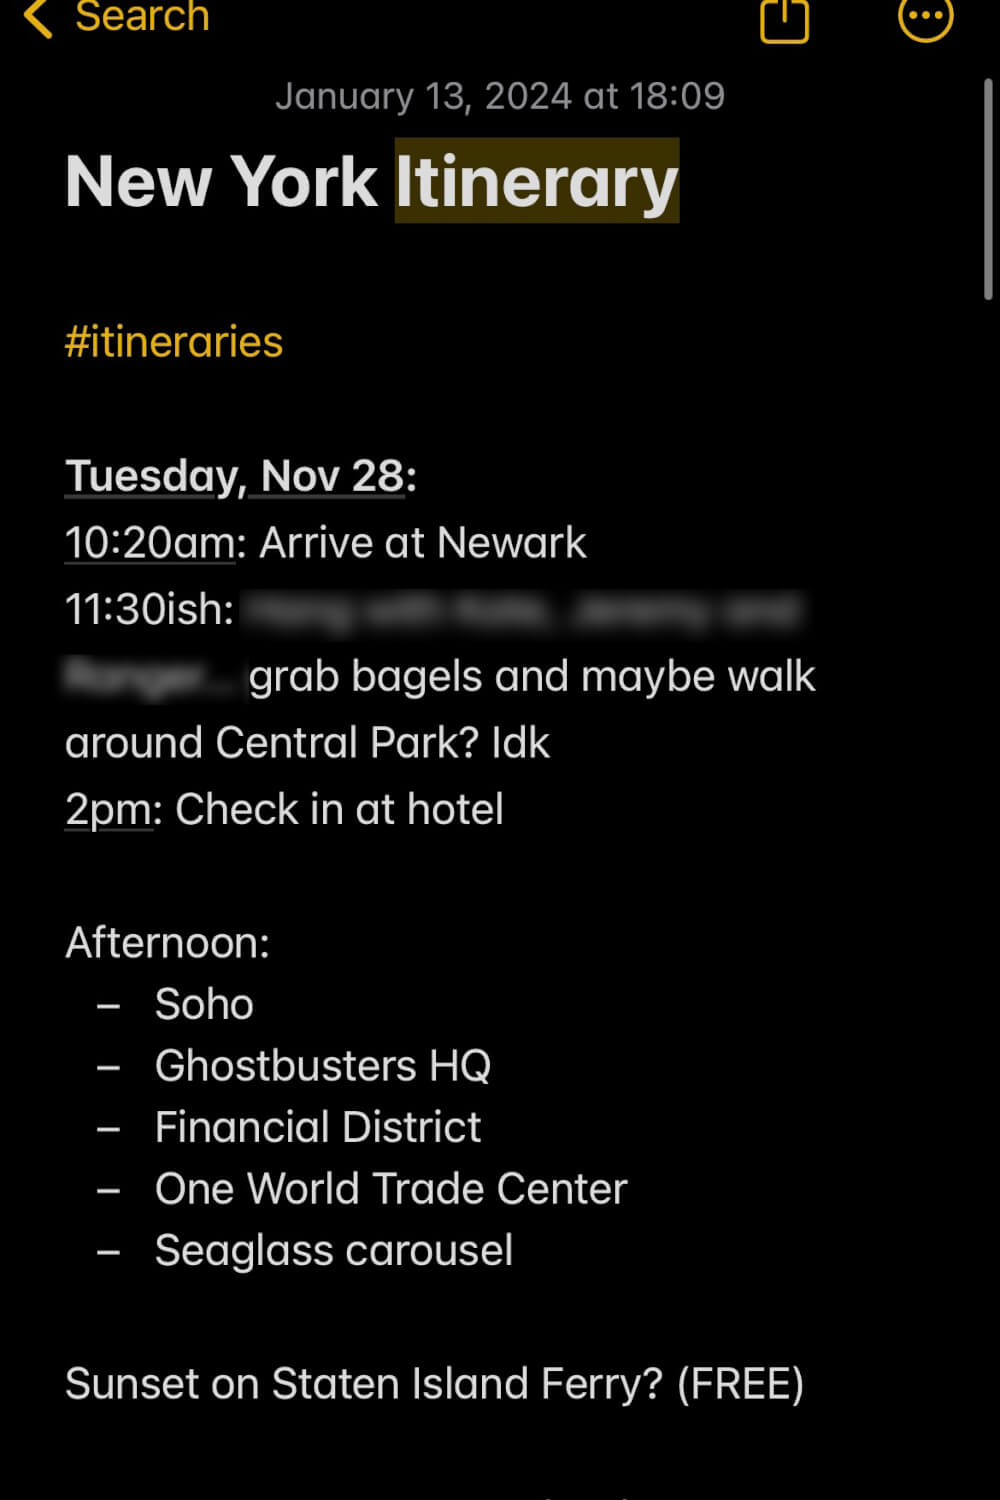
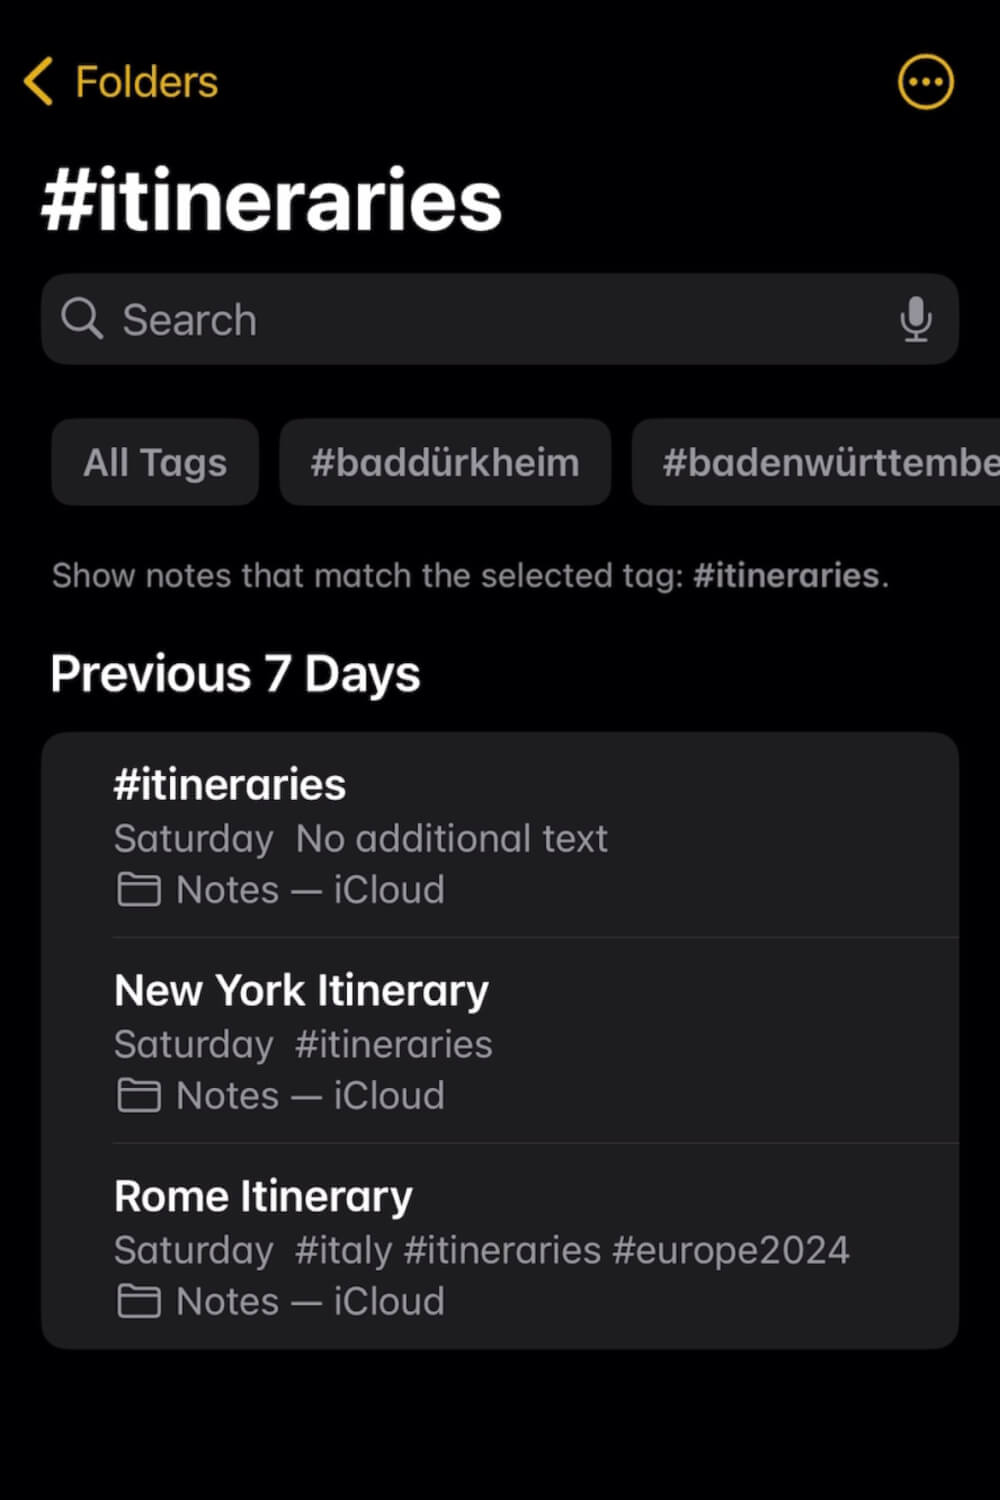
12. Using hashtags in your notes for organization
I use my Notes app religiously for every aspect of my life which explains the chaotic mess that is the almost 2000 notes stored in my iCloud…
But there’s a really easy way to organize them!
Sure, you could make a new folder for your trip but if you want to categorize Notes into lots of different potential categories, you can actually use hashtags to group them together.
HOW TO USE THIS HIDDEN FEATURE: Simply tag any related notes with a common hashtag (e.g. #itineraries, or #europetrip) and then scroll to the bottom of your notes to search for Notes by hashtag.
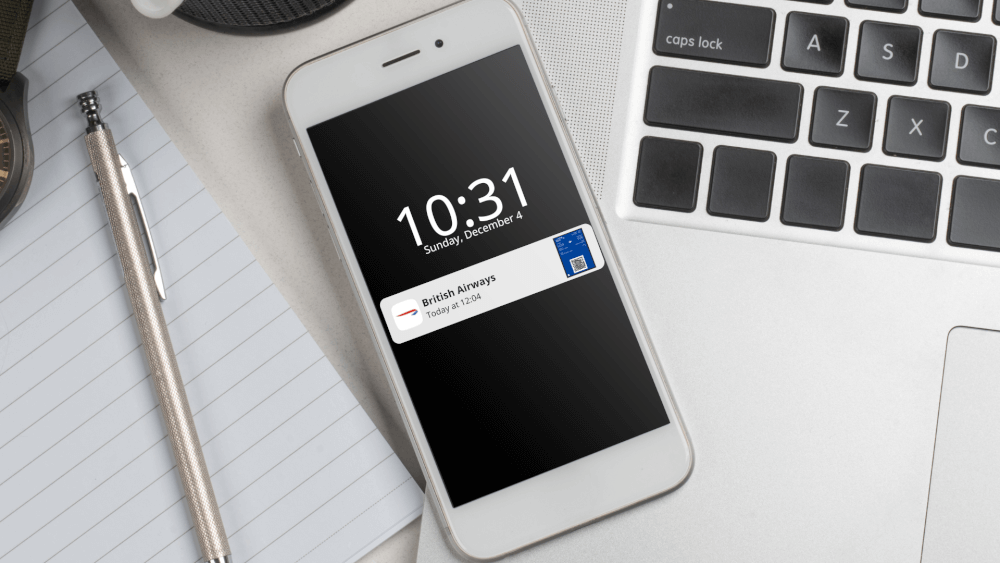
13. Add tickets to Apple Wallet whenever possible
Now, another great iPhone tip for travel is making sure you always add your tickets into Apple Wallet, whether that’s for flights, show tickets, or whatever else.
Not only is this quicker and more organized than leaving everything buried in emails, iPhones also usually keep the ticket on your lock screen close to the time of the flight or event (like a push notification), meaning you’re only ever one click away from showing your ticket.
This makes things so much simpler in high stress places like the airport!
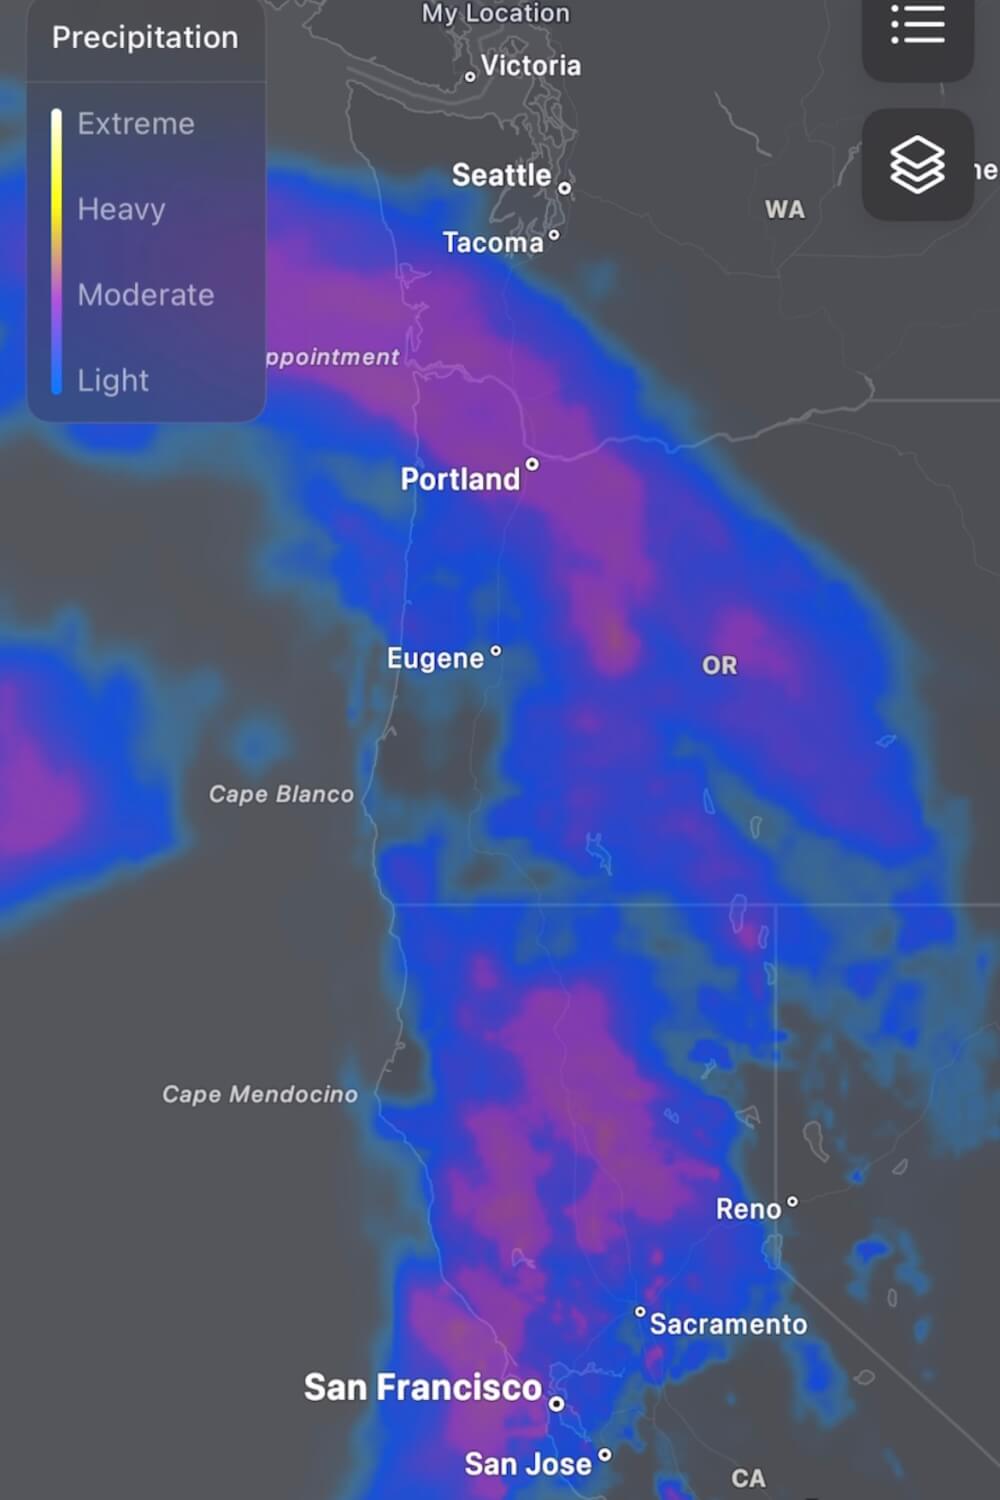
14. Unlock detailed weather maps
Now if you’ve ever been unsatisfied with the info they give you in Apple’s native weather app, then there’s a cool way to unlock more detailed maps that show you things like precipitation and wind.
HOW TO USE THIS HIDDEN FEATURE: Open your weather app, click the map icon on the bottom left side and this will open up a map view with more detailed data. Click the three stack icon in the upper right hand corner to toggle between options.
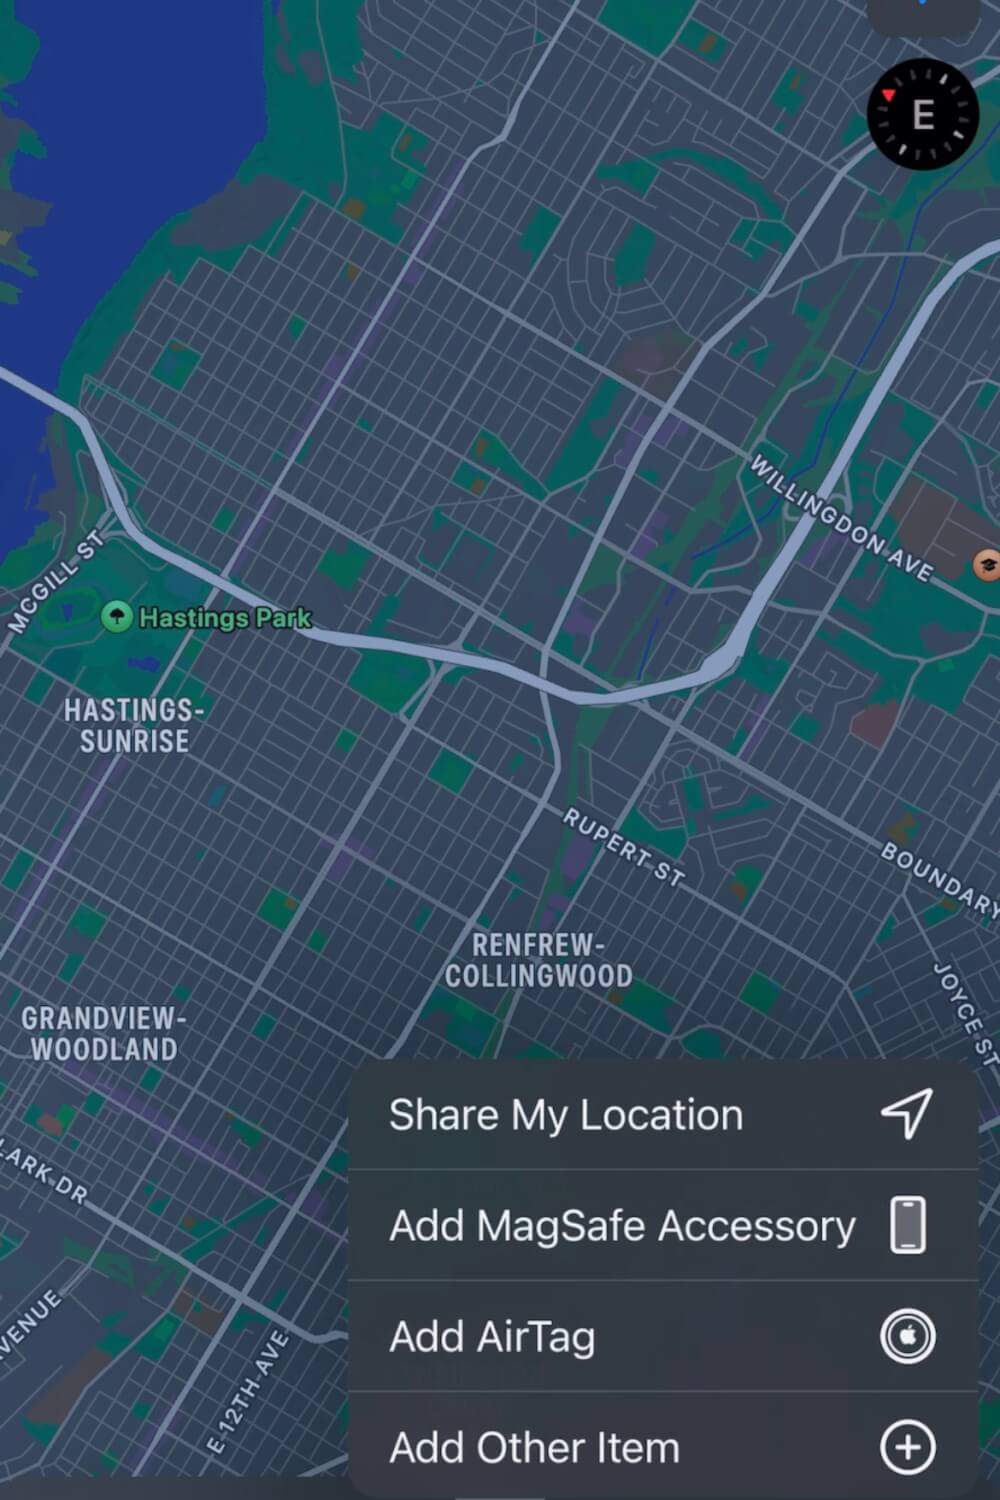
15. Send your location to friends through the Find My app
Next – I know that location tracker apps have become a big thing in terms of travel safety over the years, but with the iPhone you can actually do that through your (built in) Find My app.
This would be very helpful for keeping track of travel companions when you’re out for instance or keeping people from home updated on your whereabouts.
You can even do this via satellite if you have one of the newer iPhones (14 and up). Just open your Find My app and enable location sharing. It’s super easy.
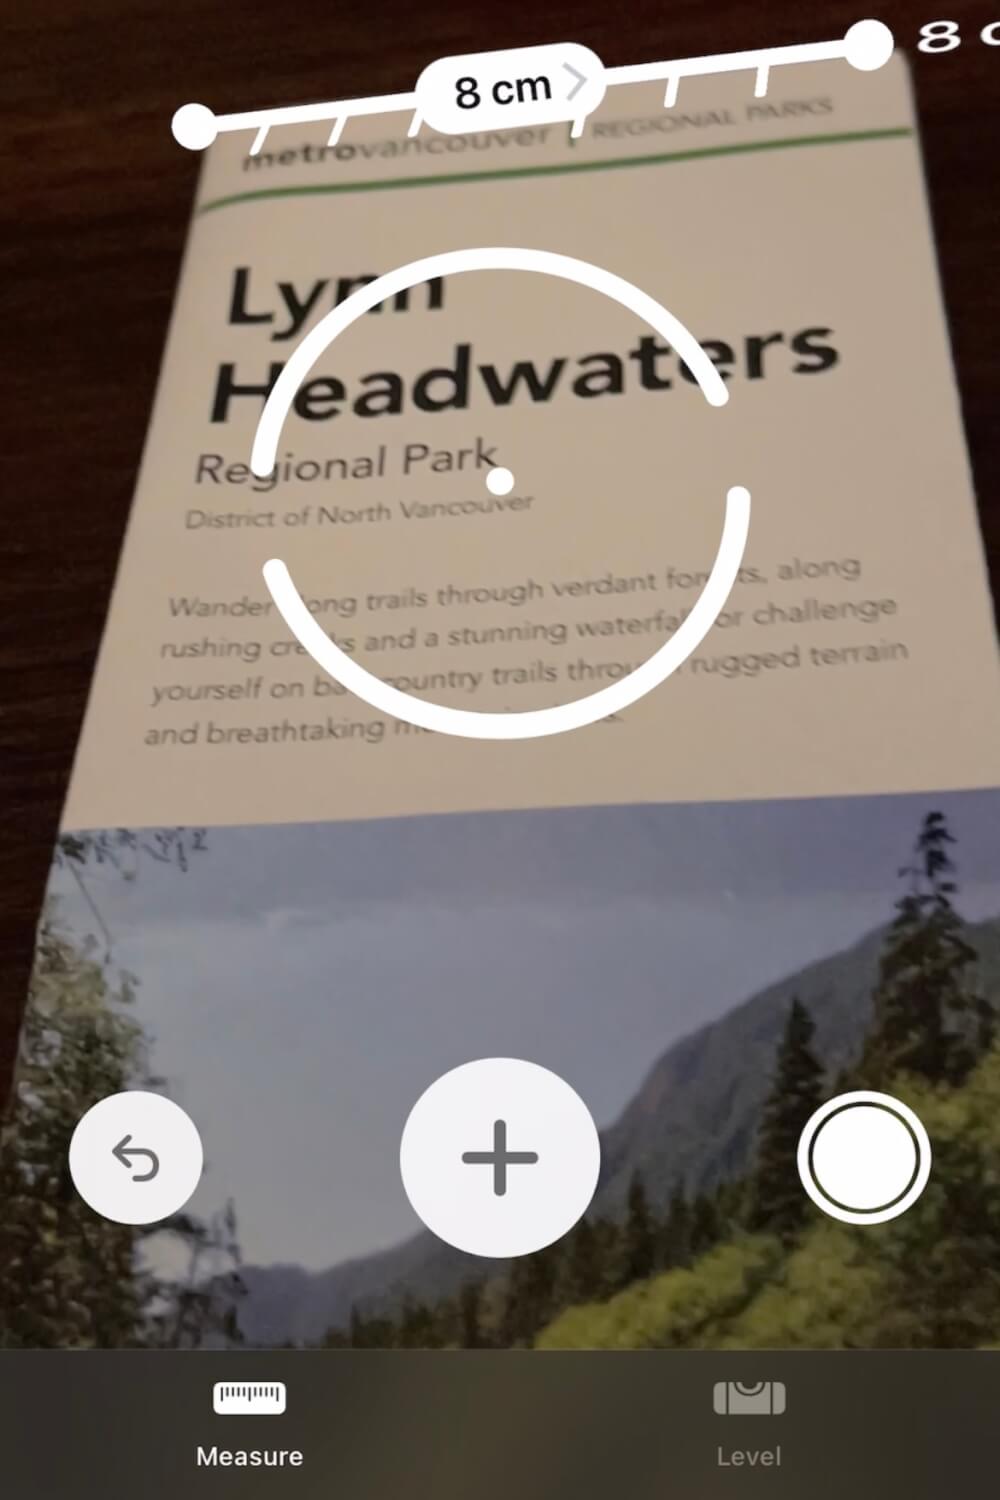
16. Use the Measure app to… measure things
Okay, I’m not sure how useful this would be in the context of travel, but it took me way too long before I realized you could do this with your iPhone, so I’ll share it anyway.
Long story short, buried in your Utilities app folder, there’s actually a Measure app that’s fairly accurate, so you can use it to… measure whatever you need to measure. This could be helpful if you’re on the go and not sure if your bags fit size requirements for example, but I’m not here to judge what you might need to measure out there. Just know it’s an option that’s available to you!
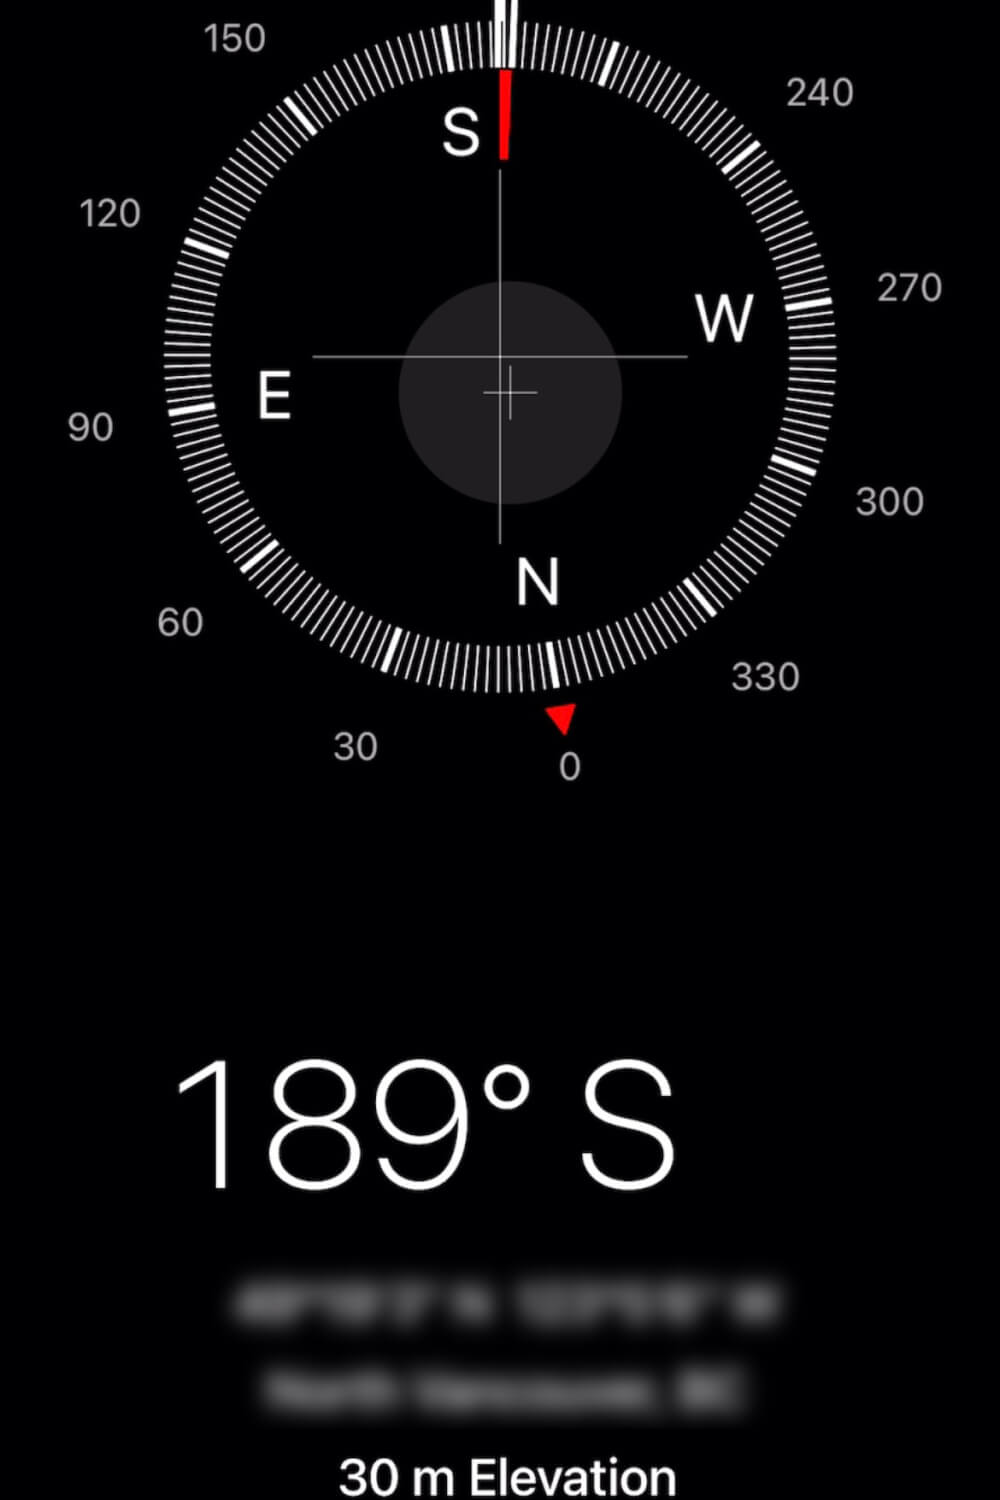
17. Use the Compass app to see your coordinates and elevation
Finally, another hidden app buried in the Utilities folder is the Compass app, which also shows your coordinates and elevation. Again, I don’t know if you’d get much use out of this in a regular travel setting, but just know that it does exist.
Did I Miss Any of Your Favourite iPhone Travel Hacks?
Alright I hope you enjoyed that list of iPhone travel hacks. If you have any more to add, be sure to let me know in the comments!