*FYI - this post may contain affiliate links, which means we earn a commission at no extra cost to you if you purchase from them. Also, as an Amazon Associate I earn from qualifying purchases. Check out our Privacy Policy and Disclosure. for more info.
Wondering how to make a beer bouquet from scratch? This tutorial showcases the step by step process for crafting the perfect bouquet of beer, a genius manly bouquet idea that is perfect for Father’s Day, Valentine’s Day or birthdays.
Okay friends, I need to let you in on a little secret today.
As much as I like to pretend that I am a cheesy little romantic person who dreams up non-stop I Love You puns & even puns about puns, the truth is sometimes, all I want is just a gigantic bouquet of booze.
… There, I said it.
Roses are nice, but beer… beer is beer, right?
So, inspired by that very poetic train of thought (quite possibly fuelled by a few too many alcoholz myself), I brewed up the most genius DIY gift for beer lovers: a beer bouquet!
Yes, you heard me right – a bouquet. Of beer.
(Plus Ferrero Rocher flowers because I’m a glutton for decadence).
After winning infinite brownie points last Valentine’s Day with this bad boy, I decided it was too good to keep away from the public eye.
So, without further ado, here’s your step by step tutorial to creating your very own beer bouquet.
Pin for later:

DIY Beer Bouquet: Materials You’ll Need
Alright crafters, here’s everything you need to make your bouquet of beer (which is more like a beer basket akin to a Spooky Basket, but let’s just roll with it):
- Bottled beer (I used 10 bottles of Stella Artois) FYI, buy some extra for drinking
- A basket (get an awesome one online for cheap here)
- Styrofoam blocks
- Ferrero Rocher chocolates (I recommend getting a 48 pack online – much cheaper!)
- Wooden skewer sticks (available here for less than $5)
- Green tissue paper
- Another coloured tissue paper (I used purple)
- (OPTIONAL) Red basket shred
NOTE: You can replicate the process below for goodies other than beer as well, simply replace beer with your git items of choice like wine, cheese, coffee, or tea.
Step by Step Beer Bouquet Instructions
Time to put this bad boy together. Here’s how you create your own bouquet of beer, step by step.
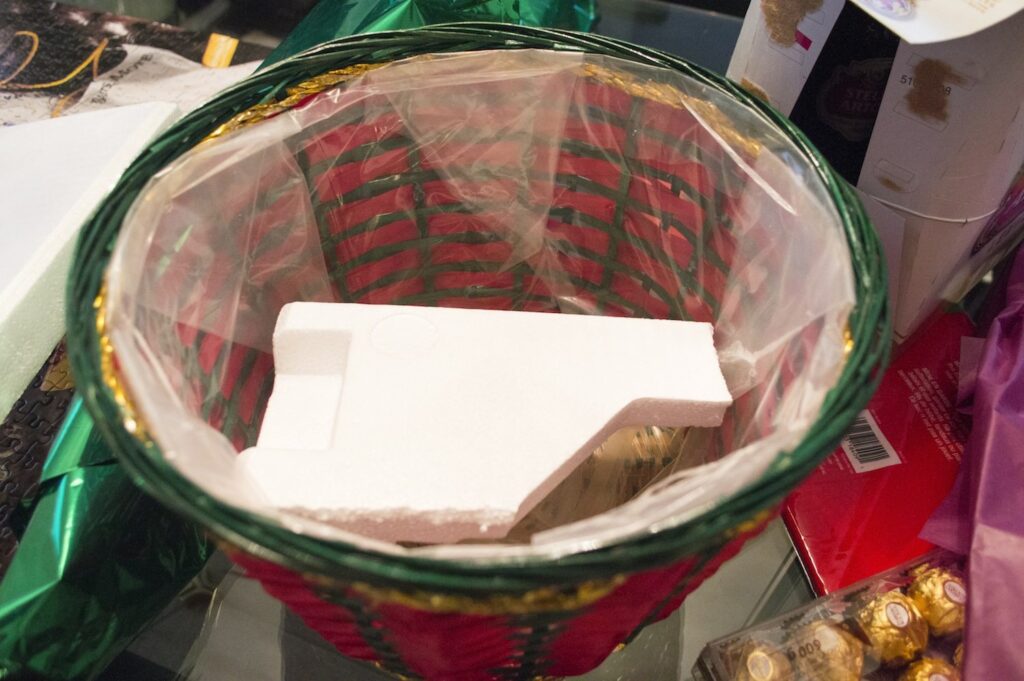
1. Arrange the beer nicely in your basket
To start your beer bouquet off on the right foot, you need to make sure you arrange the beer nicely in your basket.
How should you do this exactly?
The exact process will depend on your basket size, but for mine, I placed styrofoam blocks at the bottom of the basket to keep the bottles in place and create different beer levels (for visual variety, yenno).
TIP: Angle your bottles slightly (like flowers). This will look much nicer in your finished beer bouquet (vs bottles standing straight up!)
2. Add leaves to your beer bouquet.
What’s a bouquet without some green?
If you really want to win some brownie points, you’d make your leaves out of sweet dolla bills, which would be a genius idea for a going away gift or graduation gift.
For those of us who are non-ballers though, you can easily use some paper instead.
To add your “leaves”, cut up small squares of green tissue paper and scrunch them at the bottom, then stick them in the gaps between bottles. Keep adding until the basket looks decently full.
Pssst – at this point, be sure to conceal any styrofoam that might be visible. Gotta hide those imperfections!
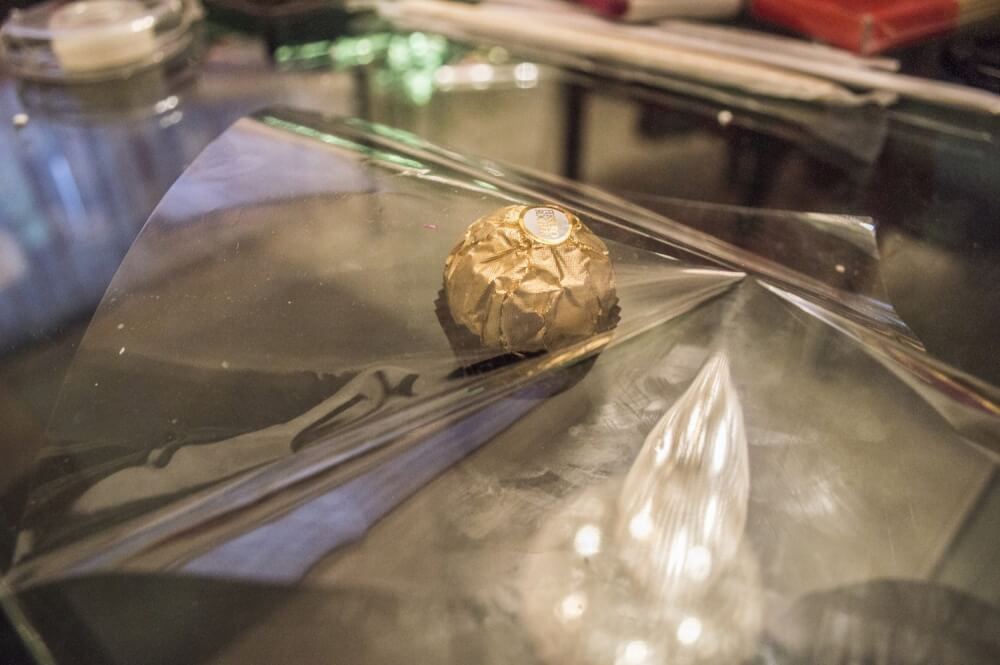
3. Make the Ferrero Rocher flowers for your bouquet.
What’s better than a bouquet made of beer?
A bouquet made of beer and CHOCOLATES!
I know – it’s mindblowing stuff.
I used Ferrero Rocher because a) they are delicious and b) I love their gold colour. It really helps to class the gift up a little bit. That said, you can use any kind of chocolates or candy to stuff your beer bouquet – the process will be the same.
So, here’s how you make those Ferrero Rocher flowers…
1. Put a small square of cellophane over your chocolate. The square should be big enough that it would be able to “wrap up” the entire chocolate.
3. Holding the wrapped chocolate steady, slide a skewer stick inside the cellophane wrapping so it touches the bottom of the chocolate (not piercing through it). Secure with tape.
4. Grab a square of coloured tissue (I used purple) and wrap it around your chocolate “flower”. Secure with tape.
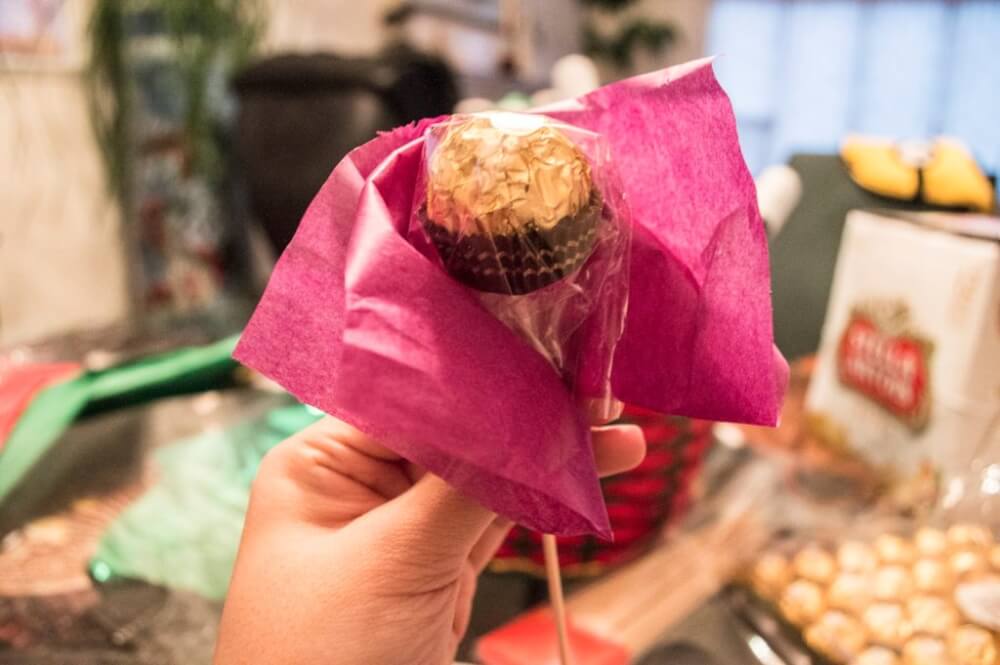
5. Stick your finished chocolate flowers into the styrofoam. Rinse and repeat until you’re able to get a nice, even distribution of Ferrero Rocher flowers throughout the basket.
4. Add the finishing touches to your beer bouquet.
This part is optional, but why not go all out? You’re already making a bouquet out of beer, so you might as well finish it off properly.
Here are a few ideas: tie a nice ribbon around your basket and glam it up some more with shiny red basket shred.
I personally bought a big bag from the Dollar Store and stuffed it liberally around the basket. It looked swishy AF.
You can also consider stuffing the bouquet with cute puns or punny I Love You messages, if the gift is intended for a boyfriend, husband, girlfriend, or wife.
And then, after doing all that, TADAAAA – you’re done! Your very own Valentine’s beer bouquet! Or birthday beer bouquet… or Monday beer bouquet…
Really, who needs an excuse to open a nice brewski surrounded by chocolate?
Not I, my friends.

I hope you enjoyed that beer bouquet how-to tutorial! Be sure to pin the idea for later and send me any photos of beer bouquets you make, my crafty readers 🙂 Until next time!